- Authors

- Name
- Harrison Broadbent
- @hrrsnbbnt
I've tried to put together the ultimate Dokku + Ruby on Rails guide. This guide covers all the basics — deploying to x86 and ARM machines, deploying Sidekiq and Redis, dockerizing our Rails app, adding post-deploy scripts, adding LetsEncrypt for SSL and HTTPS, adding backups to S3, and adding an automatic deploy script to GitHub.
There's a lot more to Dokku than what I cover here, but this guide will get you started. This guide covers everything I know from deploying to Dokku myself, as well as reading other articles from around the web.
In this article I use Hetzner for my VPS host, but you can use whichever VPS provider you prefer.
Table of Contents
- What is Dokku?
- Before we get started — why even bother with Dokku?
- Setting up our hosting and getting a VPS
- Deploying our Ruby on Rails app with Dokku (a brief preface)
- Deploying Ruby on Rails with Dokku to x86
- Deploying Ruby on Rails with Dokku to ARM (with Docker)
- Fine tuning our Dokku deployment
- Adding a domain name and Lets Encrypt SSL certificates to our Dokku app
- Dokku post-deploy scripts
- Regular database backups to S3
- Mounting persistent storage
- GitHub Action to Deploy to Dokku when we merge to main
- Conclusion
- Appendix: Building our sample Ruby on Rails app
- Update log
- 2 July 2023
- 28 October 2023
What is Dokku?
Dokku describes itself as "An open source PAAS alternative to Heroku."
Essentially, Dokku let's us convert a bare-metal server into our own private PaaS. by the end of this article, we'll be able to git push directly to our server, and Dokku will automatically build and deploy our Rails app for us.
Dokku does a lot of things under the hood, so we don't have to — things like managing our DNS and proxy, scheduling, and running Docker containers for our apps.
It's not a perfect Heroku (or new age PaaS like Render) replacement — if you're scared to touch a Linux terminal or tail some logs, Dokku is not for you.
I would say Dokku covers 70%-80% of the work for us though, and today we'll be using it to deploy a Ruby on Rails app to a VPS.
Before we get started — why even bother with Dokku?
You might be wondering —
what's the point of using Dokku? With services like Heroku and Render available, why bother deploying our app with Dokku?
There are a few reasons, but the key one is price (and hence performance).
Dokku lets you bring your own server, which means you can deploy your Ruby on Rails app to a VPS anywhere! This can result in tremendous cost savings, making it cheaper to run your apps, and letting you run them on more powerful hardware.
Let me give you an example — currently on Render, their "Pro Ultra" machine with 8 CPU cores and 32GB of RAM costs $450 USD/month. You'll also need a separate instance for your database and cache.
Costing it up might look like this —
| Type | Name | Price ($USD) | vCPU | RAM |
|---|---|---|---|---|
| Web | Pro Ultra | $450/month | 8 | 32gb |
| Database | Pro | $95/month | 2 | 4gb |
| Cache | Pro | $135/month | - | 5gb |
| Total | $680/month |
Note: this setup is probably a touch unrealistic, but you get the point.
Now, let's compare that to something like Hetzner and their new ARM servers —
| Type | Name | Price ($USD) | vCPU | RAM |
|---|---|---|---|---|
| Web | CAX41 | $29/month | 16 | 32gb |
| Database | - | included | - | - |
| Cache | - | included | - | - |
| Total | $29/month |
So we've got $680/month for Render, and ..... $29/month for Hetzner.
🤯
You might also have noticed that our Hetzner VPS has 2x the number of CPU cores available compared to the most expensive (directly) available Render instance.
Don't get me wrong — I like Render a lot! Not having to run (and worry about) your own servers is a massive plus.
But with our Render setup costing $651 USD/month more than our Hetzner VPS (which has more raw computing power available), you can start to see why self-hosting can be attractive.
Price isn't the only factor though. Self-hosting gives you full control over your system, so if, for example, you decide you want to use Traefik as your network proxy instead of NGINX — you can! It's (essentially) your server.
There's a lot more that I could discuss here, but at the end of the day, the decision is yours — if you like the extra support and security you get from using a dedicated PaaS platform (Render or Heroku), stick with them.
But, if you want to experiment with self-hosting, and unlock some massive cost savings and performance gains along the way, this is the guide for you.
We're going to dive into Dokku and use it to deploy a Ruby on Rails app.
We'll start by choosing a cloud host and installing Dokku to our server. Then, we'll deploy our Ruby on Rails app to our fresh Dokku server. Finally, I'll show you some nice-to-have extras that we can add (SSL, S3 backups, GitHub workflows etc).
Let's get started by organizing our cloud hosting.
Note: If you want to follow along with me exactly, you can follow my instructions to create a sample app.
Setting up our hosting and getting a VPS
We need some sort of VPS (virtual private server) to host our Ruby on Rails app.
In this article, I'll be using Hetzner for my server hosting. If you don't have a host in mind already, I highly recommend them — they have some of the best prices in the industry and are almost universally well-regarded.
It's important to note though that the whole point of using Dokku is that you can go with whoever you want!
You can use another cloud host like DigitalOcean or Vultr. You could even run your own machine (not recommended). The choice is yours!
As I said, I'll be using Hetzner, and the setup process is pretty straightforward. Once I created an account, I was asked to link an SSH key to the platform, which I found by running -
# I ran this on my local machine, add copied the result to Hetzner
cat ~/.ssh/id_ed25519.pub
I then created a new Hetzner project and added a new VPS running Ubuntu 22.04.
Note: I actually added two machines, an x86 CX11 instance, and an ARM CPX11 instance. This was so I could test Dokku on ARM and X86, since there are some big differences between the two, in terms of how we deploy to them, and the price/performance. I discuss this more in the x86 and ARM deployment sections below.
Then I was able to SSH into my VPS from my local terminal by running -
ssh root@ip.add.re.ss
Note: This setup process will depend on the cloud provider you choose, but it should be straightforward.
Once you can SSH into your machine and see a prompt like root@remote-server:~# ... you're good to move on.
Let's get our app deployed! We'll start with our x86 deployment, and then we'll move on to our ARM/Docker deployment.
Deploying our Ruby on Rails app with Dokku (a brief preface)
The deployment process for an x86 VPS is different to an ARM VPS!
I've split up the deployment guides into two sections, one for x86 servers, and the other for ARM servers.
When we deploy our Ruby on Rails app to Dokku, it will try to use Herokuish buildpacks to build our app. This works fine for x86 machines, but unfortunately, most Herokuish buildpacks don't support ARM.
Hence, I've split the guides into two sections — the x86 sections will use the default Herokuish buildpacks to build the apps. The ARM section will use the dockerfile-rails gem to generate a Dockerfile, and deploy that to Dokku instead.
Note: x86 machines support deploying a Dockerfile to Dokku too! I recommend giving Docker a try — Rails seems to be moving towards Docker-based deployments anyway (as of Rails 7.1).
You'll also need an app to deploy. If you've got one, great! Just note that this guide might not cover everything you need to do to get your app deployed (I'm not that good 😅).
If you don't have an app to deploy, or if you want to follow along with me, you can use the sample Rails + PostgreSQL + Sidekiq app from the appendix.
Deploying Ruby on Rails with Dokku to x86
Deploying our Ruby on Rails app with Dokku is (relatively) simple. The steps we're going to follow are —
- SSH into our server and update it
- Install Dokku and get it set up
- Create a Dokku app for our Ruby on Rails app
- Install the PostgreSQL and Redis plugins, and link them to our Dokku app
- Push our local Ruby on Rails app to our Dokku server
It's a bit more than just git push, but the steps are pretty straightforward. Worst-case, if you screw something up beyond repair, you can just wipe your VPS and start again from scratch (I did this a couple of times 😅).
Let's begin. We start by SSH-ing into our remote server —
# adjust to your servers IP address
ssh root@your.server.ip.address
From here we're going to update our server and reboot it —
sudo apt update && sudo apt upgrade
sudo reboot now
Most servers will be pretty out of date. Running these commands will update all the packages to their latest versions, and then reboot our server to make sure all the changes take effect.
Give your server a minute to reboot, then SSH in again and run —
# replace v0.30.7 with the latest Dokku version — https://github.com/dokku/dokku/releases
wget -NP . https://dokku.com/install/v0.30.7/bootstrap.sh
sudo DOKKU_TAG=v0.30.7 bash bootstrap.sh
This command will install Dokku on our server, including all the requirements (NGINX, Docker etc), and might take a few minutes.
Once that's done, we can run the following —
# add our own ssh key so we can git push to our dokku instance
cat ~/.ssh/authorized_keys | dokku ssh-keys:add admin

# add our server IP to dokku domains, so we can visit them in our browser
dokku domains:set-global your.server.ip.address
dokku domains:set-global your.server.ip.address.sslip.io # note the .sslip.io following the IP address
Most servers should store their authorized SSH access key in ~/.ssh/authorized_keys, which we pass through to Dokku. This key should match the public key on your dev machine, so we can git push to our remote Dokku instance later.
After adding our SSH key to Dokku, we expose our server's IP address as a domain, so we can access our Rails app in our browser (we also add a custom URL to our deployment later in this guide).
Once that's done, we need to create our Dokku app —
dokku apps:create test-rails
This will create a new Dokku app for our project. You can change the test-rails name — just try to keep it short and easy to type.
Next, we need to export the required environment variables for our app. Our Ruby on Rails app only needs two — RAILS_ENV and RAILS_MASTER_KEY — and we can export them with -
dokku config:set test-rails RAILS_ENV=production RAILS_MASTER_KEY=346534_your_key_goes_here_481
Make sure to copy the master key from your Ruby on Rails app. It should be located at
config/master.key.
Now, we're going to install PostgreSQL for our database, and Redis for our cache.
Dokku makes this easy for us through Dokku's built-in plugins.
We just need to run the following —
# add postgres to dokku app
dokku plugin:install https://github.com/dokku/dokku-postgres.git
dokku postgres:create test-rails-db
dokku postgres:link test-rails-db test-rails

# add redis to dokku app
dokku plugin:install https://github.com/dokku/dokku-redis.git redis
dokku redis:create test-rails-redis
dokku redis:link test-rails-redis test-rails
These commands install the Dokku plugins for PostgreSQL and Redis, then create an instance of each and link them to our Ruby on Rails app.
If you run dokku config test-rails, you'll see that the DATABASE_URL and REDIS_URL have been set for us, along with RAILS_ENV and our RAILS_MASTER_KEY from before —
root@harrison-dev-arm:~# dokku config:show test-rails
=====> test-rails env vars
DATABASE_URL:             postgres://postgres:e0004b56da8f3585511bdd7eebe8e7d0@dokku-postgres-test-rails-db:5432/test_rails_db
REDIS_URL:                redis://:fff43c9a20f60b41498f1e063c0ee460a4256a5214d2f0247c375a4b1f53d010@dokku-redis-test-rails-redis:6379
RAILS_MASTER_KEY:         346534_key_from_before_481
RAILS_ENV:                production
...
That's it on the Dokku side.
Now you just need to make a few adjustments to your Rails app.
First, you need to set up your Rails app with a Procfile (don't get it confused with Procfile.dev). The Procfile is what Dokku will use to deploy our Ruby on Rails app, and is based on the Heroku Procfile.
If you want to learn more about the Procfiles and
Procfile.dev, I've written about it here — Procfile.dev, bin/dev, and Rails 7.
For example, the Procfile for my sample app looks like this —
web: bundle exec puma -C config/puma.rb
worker: bundle exec sidekiq -C config/sidekiq.yml
release: bundle exec rails db:migrate
We define our web: process to run our main app, and a worker: process to run Sidekiq. We also define a release: process to run our database migrations, which Dokku will run for us after building our app.
Since I'm developing on an M2 Macbook, I also needed to add x86 as an additional target for Ruby's bundler —
bundle lock --add-platform x86_64-linux
After that, we can add Dokku as a remote git source to our app, and push to it —
git remote add dokku dokku@your.server.ip.address:test-rails
git push dokku main
Our app is finally deploying! Your Ruby on Rails app will automatically build with the correct buildpacks, and at the end, you'll see a message like this —
=====> Application deployed:
       http://test-rails.your.server.ip.address.sslip.io
There's one last thing we need to do — we need to tell Dokku to run an instance of our worker:. By default, it will just run an instance of our web: process.
To do this, on our remote server, we need to run —
dokku ps:scale test-rails web=1 worker=1
Then we can run dokku ps:report test-rails to check that our worker is running —
dokku ps:report test-rails
=====> test-rails ps information
       Deployed:                      true
       Processes:                     2
       Ps can scale:                  true
       Ps computed procfile path:     Procfile
       Ps global procfile path:       Procfile
       Ps procfile path:
       Ps restart policy:             on-failure:10
       Restore:                       true
       Running:                       true
       Status web 1:                  running (CID: d4e27738ce8)
       Status worker 1:               running (CID: d8b441235ad)
Looks good!
Now finally, visit http://test-rails.your.ip.sslip.io/posts/index, and you should see the posts#index page for your Ruby on Rails app —
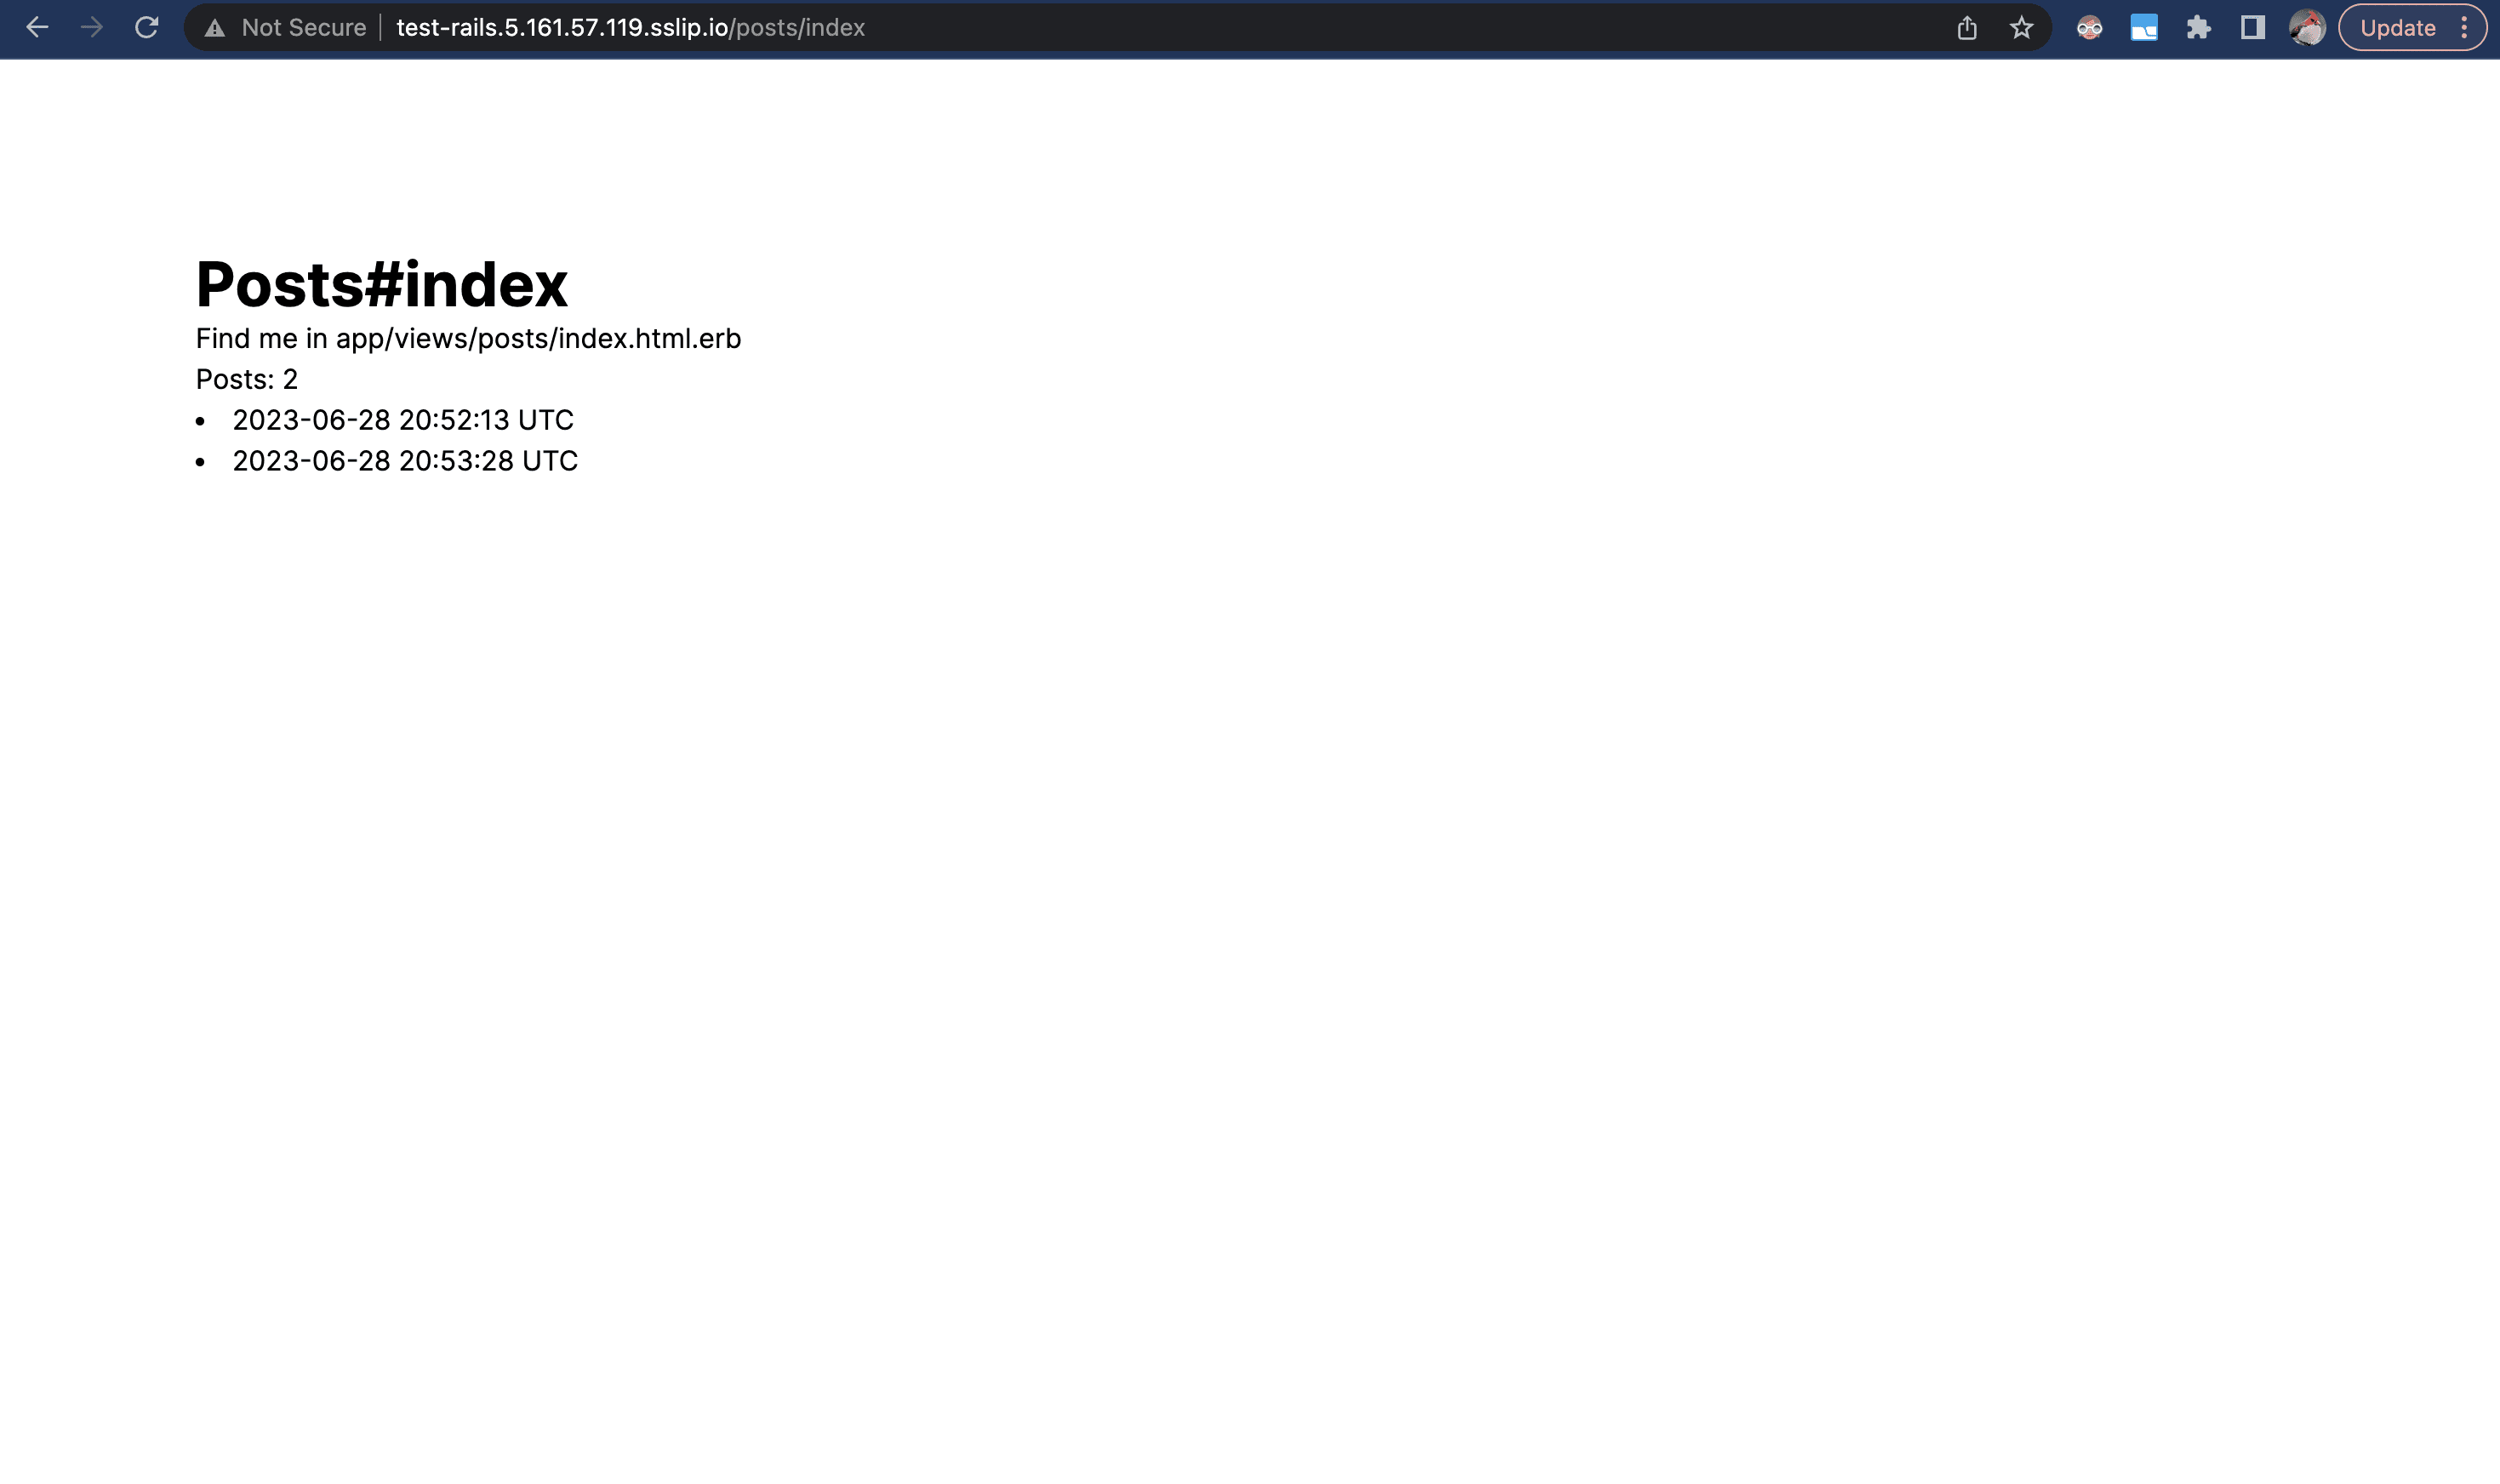
Congratulations! Your Ruby on Rails app is now deployed and running on your Dokku server. If you wait a minute, you should see our sidekiq-cron job automatically create a Post.
I've already shown how to use dokku ps:report test-rails to view your running processes. You can also run dokku logs test-rails -t to tail your Rails logs, and you should see something like this —
...
2023-06-29T07:40:59.828196354Z app[web.1]: [7] Puma starting in cluster mode...
2023-06-29T07:40:59.828346835Z app[web.1]: [7] * Puma version: 5.6.6 (ruby 3.2.0-p0) ("Birdie's Version")
2023-06-29T07:40:59.828399475Z app[web.1]: [7] *  Min threads: 5
2023-06-29T07:40:59.828461396Z app[web.1]: [7] *  Max threads: 5
2023-06-29T07:40:59.828511636Z app[web.1]: [7] *  Environment: production
...
2023-06-29T10:55:18.857081616Z app[worker.1]: saved post
2023-06-29T10:55:18.857112536Z app[worker.1]: #<Post:0x0000ffff7bd6f148>
2023-06-29T10:55:18.857311617Z app[worker.1]: pid=7 tid=h1j class=SidekiqPostJob jid=900d9f1115252b82a531de59 elapsed=0.005 INFO: done
Here we confirm that our Ruby on Rails app is running smoothly — the web.1 process booted without errors, and the worker.1 process is running our SidekiqPostJob every minute.
That's it for the x86 deployment basics. If you're interested in learning how we do things differently for ARM servers (hint: we use Docker), then read on. Otherwise, you can skip further down where we add an SSL certificate and domain, add automatic S3 backups, and add a GitHub Workflow action to automatically push to Dokku.
Let's continue though, and use Dokku to deploy our Ruby on Rails app to an ARM server.
Deploying Ruby on Rails with Dokku to ARM (with Docker)
If you try to follow the x86 instructions to deploy a Ruby on Rails app to an ARM server (instead of an x86 server) you'll see an error like this (after you run git push dokku main) —
.....
FATAL: Herokuish builder not supported on arm64 servers
The error message is pretty straightforward — Dokku can't build our app, because most of the builpacks used by the herokuish package to auto-build our app are not ARM compatible.
This is a shame! More hosting providers (Hetzner, AWS) are offering ARM servers. Currently, ARM servers also tend to offer much better price/performance than their x86 counterparts.
Fortunately, there's another way to deploy our Rails app — Docker.
Dokku supports deployment from a Dockerfile.
Recently, there's been a lot of work in the Rails community to start embracing Docker (the release of MRSK, Rails 7.1 including a default Dockerfile, etc etc.)
Even though Rails 7.1 isn't out yet (at the time of writing, June 2023), we can take advantage of these developments, mainly through the dockerfile-rails gem. This gem will auto-generate a Dockerfile for our Ruby on Rails app.
Apart from the Docker stuff, our deployment process is the same as the x86 process. The key difference is that when we push our Ruby on Rails app to Dokku, Dokku will detect the Dockerfile and use that to build our app, rather than using herokuish buildpacks.
I'm not going to cover everything again. Apart from the Dockerfile setup, it's the same process as our x86 deployment from before. The main steps are identical and are —
- SSH into our server and update it
- Install Dokku and get it set up
- Create a Dokku app for our Ruby on Rails app
- Install the PostgreSQL and Redis plugins, and link them to our Dokku app
- [NEW] Generate a Dockerfile for our Ruby on Rails app
- Push our local Ruby on Rails app to our Dokku server
Creating the Dockerfile for our Ruby on Rails app is made incredibly simple thanks to the dockerfile-rails gem. This gem will automatically generate a Dockerfile for our Ruby on Rails app, including the PostgreSQL database and Redis cache.
To add a Dockerfile to our sample Ruby on Rails app, we can run the following —
# add the dockerfile-rails gem — https://github.com/fly-apps/dockerfile-rails
bundle add dockerfile-rails --optimistic --group development

# generate a Dockerfile for app
bin/rails generate dockerfile --postgresql --redis --jemalloc --yjit
This will add the dockerfile-rails gem to our Ruby on Rails app, and then generates a Dockerfile for our app with PostgreSQL and Redis included.
We also include jemalloc and yjit in our Dockerfile. You might be wondering why we do that (or what they even are).
jemmallocis "a general purpose malloc(3) implementation that emphasizes fragmentation avoidance and scalable concurrency support". Addingjemallocto our Ruby on Rails app can vastly improve its memory performance (>20% improvements seem common). You can read more about it at the official jemalloc site, and for a more rails-centric look into jemalloc, see this speedshop article on malloc and jemalloc.YJITis the new Ruby compiler from Shopify. It was deemed production-ready in early 2023 and seems to currently offer a ~10%-30% speedup for most apps (at a slight memory tradeoff, offset byjemalloc).
Note:
YJITonly supports Ruby 3.1 and above. You should also do your own investigation to make surejemallocandYJITplay nicely with your Rails app.
Adding a Dockerfile was all we needed — Dokku can now use our Dockerfile to deploy our Ruby on Rails app to an ARM server.
If you followed the other steps correctly (including the steps from the x86 section on setting up Dokku, adding PostgreSQL and Redis etc), you should be able to run -
git remote add dokku dokku@your.server.ip.address:test-rails
git push dokku main
Just wait as your Ruby on Rails app deploys to Dokku using its Dockerfile. Watch the deployment logs — you'll see Dokku building our Dockerfile —
git push dokku main

Enumerating objects: 27, done.
Counting objects: 100% (27/27), done.
Delta compression using up to 8 threads
Compressing objects: 100% (13/13), done.
Writing objects: 100% (14/14), 2.41 KiB | 2.41 MiB/s, done.
Total 14 (delta 9), reused 0 (delta 0), pack-reused 0
-----> Cleaning up...
-----> Building test-rails from Dockerfile
-----> Setting config vars
       DOKKU_DOCKERFILE_PORTS:  3000
remote: #1 [internal] load .dockerignore
remote: #1 transferring context: 756B done
remote: #1 DONE 0.0s
remote:
remote: #2 [internal] load build definition from Dockerfile
remote: #2 transferring dockerfile: 2.20kB done
remote: #2 DONE 0.0s
remote:
remote: #3 resolve image config for docker.io/docker/dockerfile:1
remote: #3 DONE 0.8s
...
=====> Application deployed:
       http://your.server.ip.address.sslip.io
There's one final thing to do — since our Dockerfile exposes port 3000, we need to configure Dokku to use that.
Log into your remote server and run —
dokku ports:set test-rails http:80:3000
Note: This is the new syntax for Dokku
0.31.0+. Older versions of Dokku used the commanddokku proxy:ports-set. Learn more in the Dokku Port Management docs.
Again, you should be able to visit http://test-rails.server.ip.sslip.io/posts/index, and see the posts#index page for your Ruby on Rails app —
Fine tuning our Dokku deployment
Now that we've got our Rails app deployed with Dokku, there are a couple of things we can do to improve the security, developer experience, and reliability of our Dokku deployment.
Below, I cover all of the following —
- Adding a domain name and Lets Encrypt SSL certificates to our Dokku app
- Dokku post-deploy scripts
- Regular database backups to S3
- Mounting persistent storage
- GitHub Action to Deploy to Dokku when we merge to main
These are all optional "upgrades" to our Dokku deployment. You're probably going to want to add a domain name and SSL certificates, but it's technically optional (ie: you might be fine with accessing your Rails app via the server IP address).
Other tweaks, like the GitHub action for automatically deploying any changes to our main branch, are a nice to have, but totally optional.
Feel free to jump around to different the different Dokku tips, otherwise, let's get started!
Adding a domain name and Lets Encrypt SSL certificates to our Dokku app
Once you've got your app running, you're probably going to want to assign it a domain.
Note: This is not required! You can just use the server IP address directly if you want (like we've already been doing).
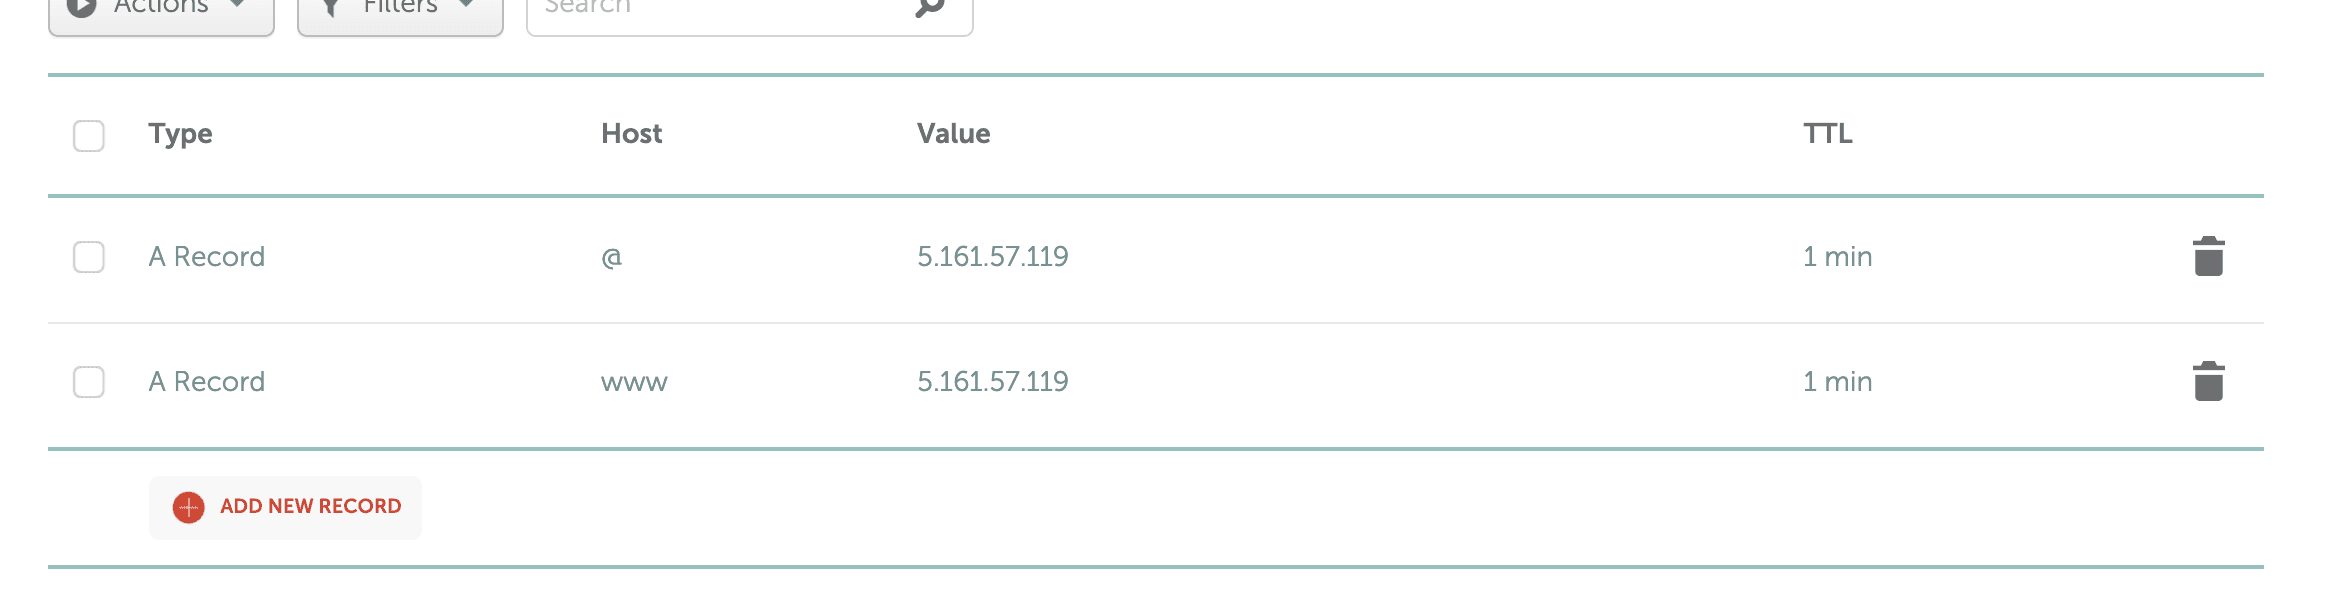
The first thing you need to do is buy a domain.... duh. The second thing is to add two A records to your DNS, pointing back to the server hosting your Dokku app -
Type      Host  Value                   TTL
A Record  @     your.server.ip.address  1 min
A Record  www   your.server.ip.address  1 min
Note: Feel free to adjust the TTL setting. Using
1 minshould help our updates propagate quicker, but you probably want to set them back toAutomaticlater.
I used Namecheap for my domains, and I ended up with something like this —
After that, we just need to configure a few things on our Dokku server. The following commands install the Dokku LetsEncrypt plugin to automatically issue a TLS certificate for us (so we can use HTTPS on our domain).
We use dokku domains:set to add our new domain to our Dokku app, then we enable LetsEncrypt for our project, and add a cron job to check daily if our certificate needs renewal (and renew them if needed).
# install the letsencrypt plugin to our Dokku instance
sudo dokku plugin:install https://github.com/dokku/dokku-letsencrypt.git
dokku letsencrypt:set test-rails email youremail@domain.com

# set a custom domain that you own for your application
dokku domains:set test-rails newdomain.com

# enable letsencrypt for our app
dokku letsencrypt:enable test-rails

# enable auto-renewal
dokku letsencrypt:cron-job --add
Note: Take care with the
config.force_sslsetting in theenvironment/production.rbfile of your Rails app. If you're testing your app before setting a TLS certificate, this should befalse. Once you add a TLS certificate though, you're going to want to come back here. Having this misconfigured can causeFailed to connecterrors, which can be tricky to debug.
Now if we visit newdomain.com in our browser, it should work and serve us our app. If you visit newdomain.com/posts/index, you should see the same posts page as before —
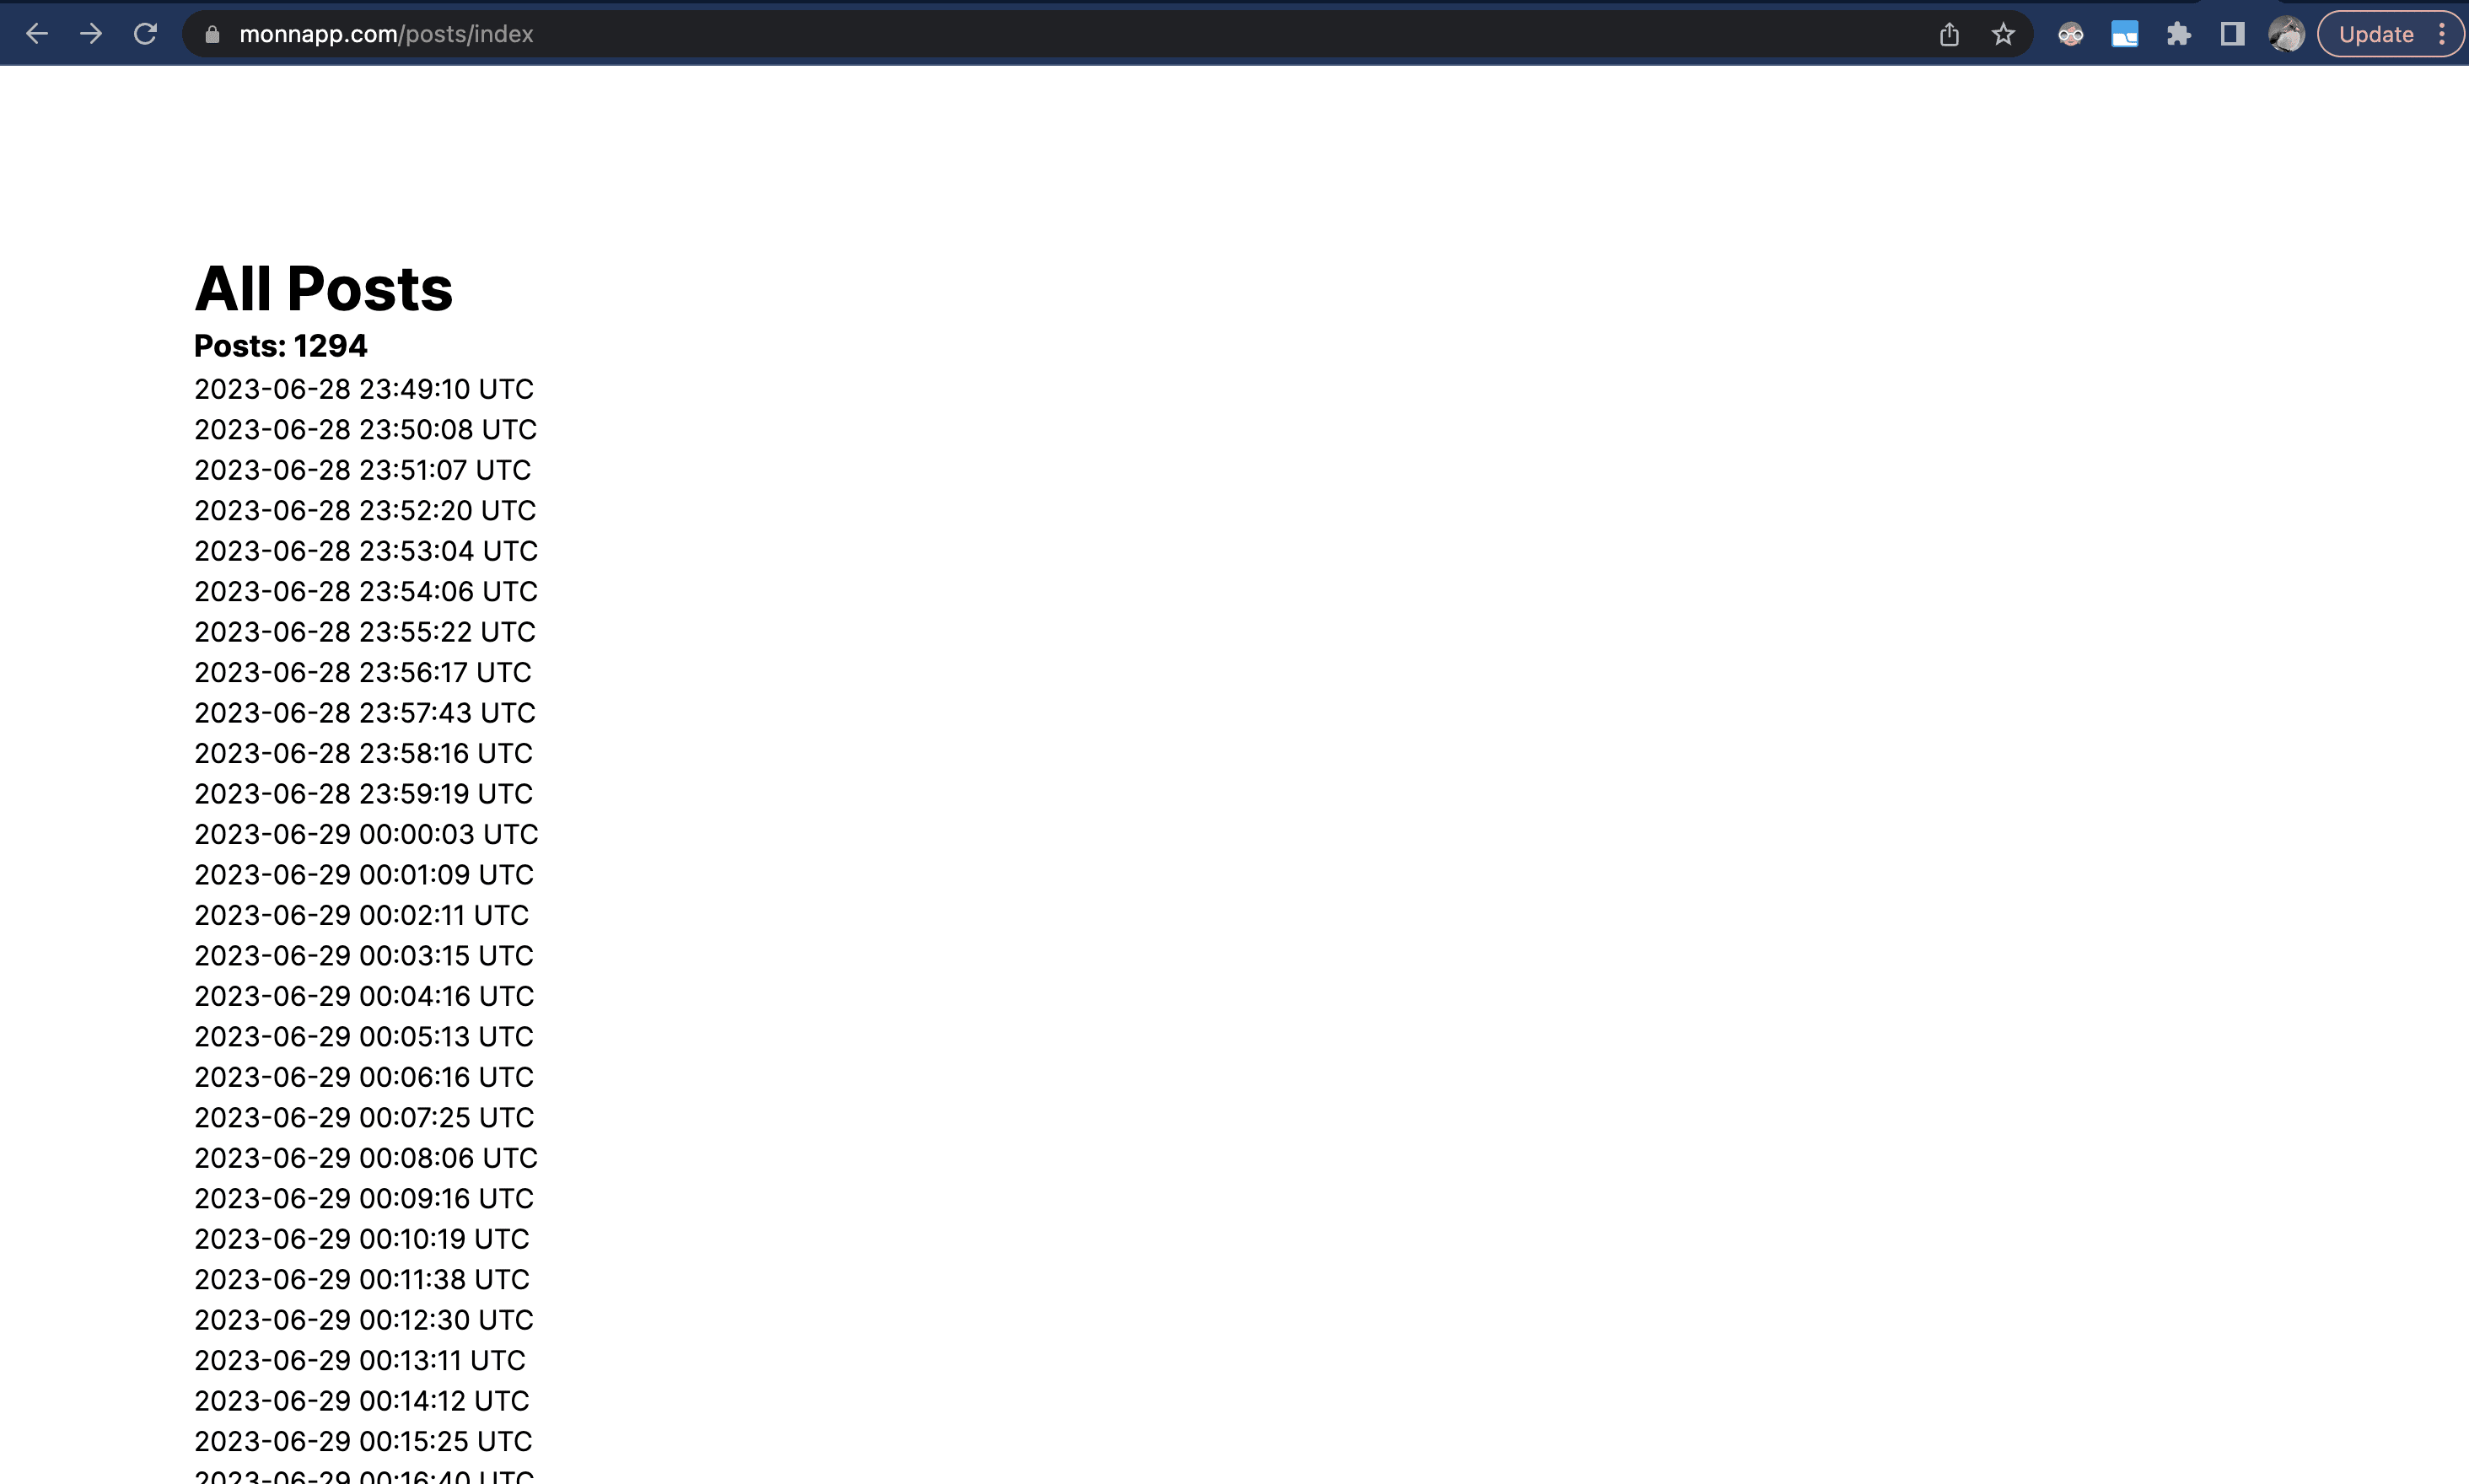
Nice!
Dokku post-deploy scripts
It's pretty common to want to run some commands before or after a deployment. For example, we used a Procfile with a release: process earlier — this let us run our database migrations after each deployment.
Dokku supports a few ways of running post-deploy scripts.
As I mentioned, the first method is to use a Procfile —
web: bundle exec puma -C config/puma.rb
worker: bundle exec sidekiq -C config/sidekiq.yml
release: bundle exec rails db:migrate
Dokku will run the release: process after deploying our app (emulating the behaviour of the Heroku Release Phase command). If you watch the Dokku logs when you deploy the app, you can see Dokku running release: for us —
remote:        -----> Discovering process types
remote:        Procfile declares types -> release, web, worker
remote: -----> Releasing test-rails...
remote: -----> Checking for predeploy task
remote:        No predeploy task found, skipping
remote: -----> Checking for release task
-----> Executing release task from Procfile: bundle exec rails db:migrate
=====> Start of test-rails release task (b2985e801) output
       I, [2023-06-28T20:48:29.127669 #9]  INFO -- : Migrating to CreatePosts (20230628024001)
       == 20230628024001 CreatePosts: migrating ======================================
       -- create_table(:posts)
          -> 0.0040s
       == 20230628024001 CreatePosts: migrated (0.0040s) =============================
=====> End of test-rails release task (b2985e801) output
Dokkku also supports a second method of specifying deployment tasks by using an app.json file —
{
  "name": "test-rails dokku app.json file to configure dokku for our app",
  "description": "this app.json only configures deployment scripts for our app. It can do a lot more though (ie: we configure a cron job below)",
  "keywords": [],
  "scripts": {
    "dokku": {
      "predeploy": "crake assets:clobber && rake assets:precompile", //command to run at predeploy phase (ie: recompile assets)
      "postdeploy": "bundle exec rake db:migrate" // command to run after deploying everything (ie: db migrations)
    },
    "postdeploy": "rake db:seed" // command to run only ever ONCE, after the app is first deployed (ie: load seed data)
  }
}
You can add a Dokku-compatible app.json file to your Ruby on Rails app by creating the file in the root directory of your project. Dokku also supports adjusting this path, if you want to organise your app a bit differently, with the app-json:set command —
# change .dokku/app.json to the location of your app.json file (default path is root directory)
dokku app-json:set node-js-app appjson-path .dokku/app.json
The benefit of the app.json file is that we can specify a few more tasks.
In most cases though, I think the Procfile release: process is probably sufficient, and also simpler to use. It also keeps all the deployment information inside our Procfile. Ultimately though it's just a matter of preference.
Reference: https://dokku.com/docs/advanced-usage/deployment-tasks/
Regular database backups to S3
Dokku and the dokku-postgres plugin support automatic backups to AWS S3 buckets, or to an S3-compatible service.
You can learn more about it using these links, but the setup process is pretty straightforward.
To schedule automatic backups of our Dokku apps database, we can run —
# authenticate our backups
dokku postgres:backup-auth test-rails-db AWS_ACCESS_KEY_ID AWS_SECRET_ACCESS_KEY

# schedule a backup of our database at 3am each morning
dokku postgres:backup-schedule test-rails-db "0 3 * * *" my-s3-bucket

# list the backup schedules for our database
dokku postgres:backup-schedule-cat test-rails-db
This will authenticate Dokku to AWS (or another S3 compatible host), schedule a backup at 3am each morning, and then print out the backup schedule for us to double-check.
Mounting persistent storage
Every time we deploy a new version of our Ruby on Rails app to Dokku, Dokku spins up a new container for our app. Our Redis and Postgres instances are safe, but any file uploads (ie: user-uploaded images) that were stored in the container will be lost.
To fix this, we can mount a persistent volume to our app. You can read more about this at Dokku persistent storage, but the process is pretty simple —
# create storage for our test-rails app on our remote server
dokku storage:ensure-directory test-rails-storage

# mount the directory into our app's /storage directory, relative to root
dokku storage:mount test-rails /var/lib/dokku/data/storage/test-rails-storage:/app/storage

# restart
dokku ps:restart test-rails
These commands create a new storage for our app and mounts it into the recommended Dokku path.
We can check that our storage is mounted correctly by running —
dokku storage:report

=====> test-rails storage information
       Storage build mounts:
       Storage deploy mounts:         -v /var/lib/dokku/data/storage/test-rails-storage:/app/storage
       Storage run mounts:            -v /var/lib/dokku/data/storage/test-rails-storage:/app/storage
Now we've mounted a persistent volume that will endure between deployments.
GitHub Action to Deploy to Dokku when we merge to main
Having to git push dokku main every time we want to deploy new changes to our app is pretty annoying. Fortunately, Dokku includes a handy GitHub action and some handy example workflows for us to use.
Let's create our own GitHub action to deploy to Dokku whenever we merge to the main branch (you can adjust the branch).
The first thing we need to do is create a GitHub workflow in your Ruby on Rails app —
mkdir -p .github/workflows
touch .github/workflows/deploy.yml
Then we can add a workflow like this to, which I based on the simple example from Dokku —
---
name: 'Dokku auto-deploy main branch'

# Github creates a "push" when you EITHER: push to a branch OR merge a PR into it
# So this action will run on direct pushes to "main" OR a merged PR
on:
  push:
    branches:
      - main

jobs:
  deploy:
    runs-on: ubuntu-latest
    steps:
      - name: Cloning repo
        uses: actions/checkout@v2
        with:
          fetch-depth: 0

      - name: Push to dokku
        uses: dokku/github-action@v1.4.0
        with:
          branch: main
          git_remote_url: 'ssh://dokku@your.server.ip.address:test-rails'
          ssh_private_key: ${{ secrets.SSH_PRIVATE_KEY }}
This GitHub action will trigger each time we push to the main branch of our app (either a direct push, or a merged pull request). It runs the dokku/github-action and pushes the main branch to our git_remote_url using the ssh_private_key from our GitHub env.
We need to set the environment variable. You can do this by going to Settings -> Secrets and variables -> Actions and adding an SSH_PRIVATE_KEY secret.
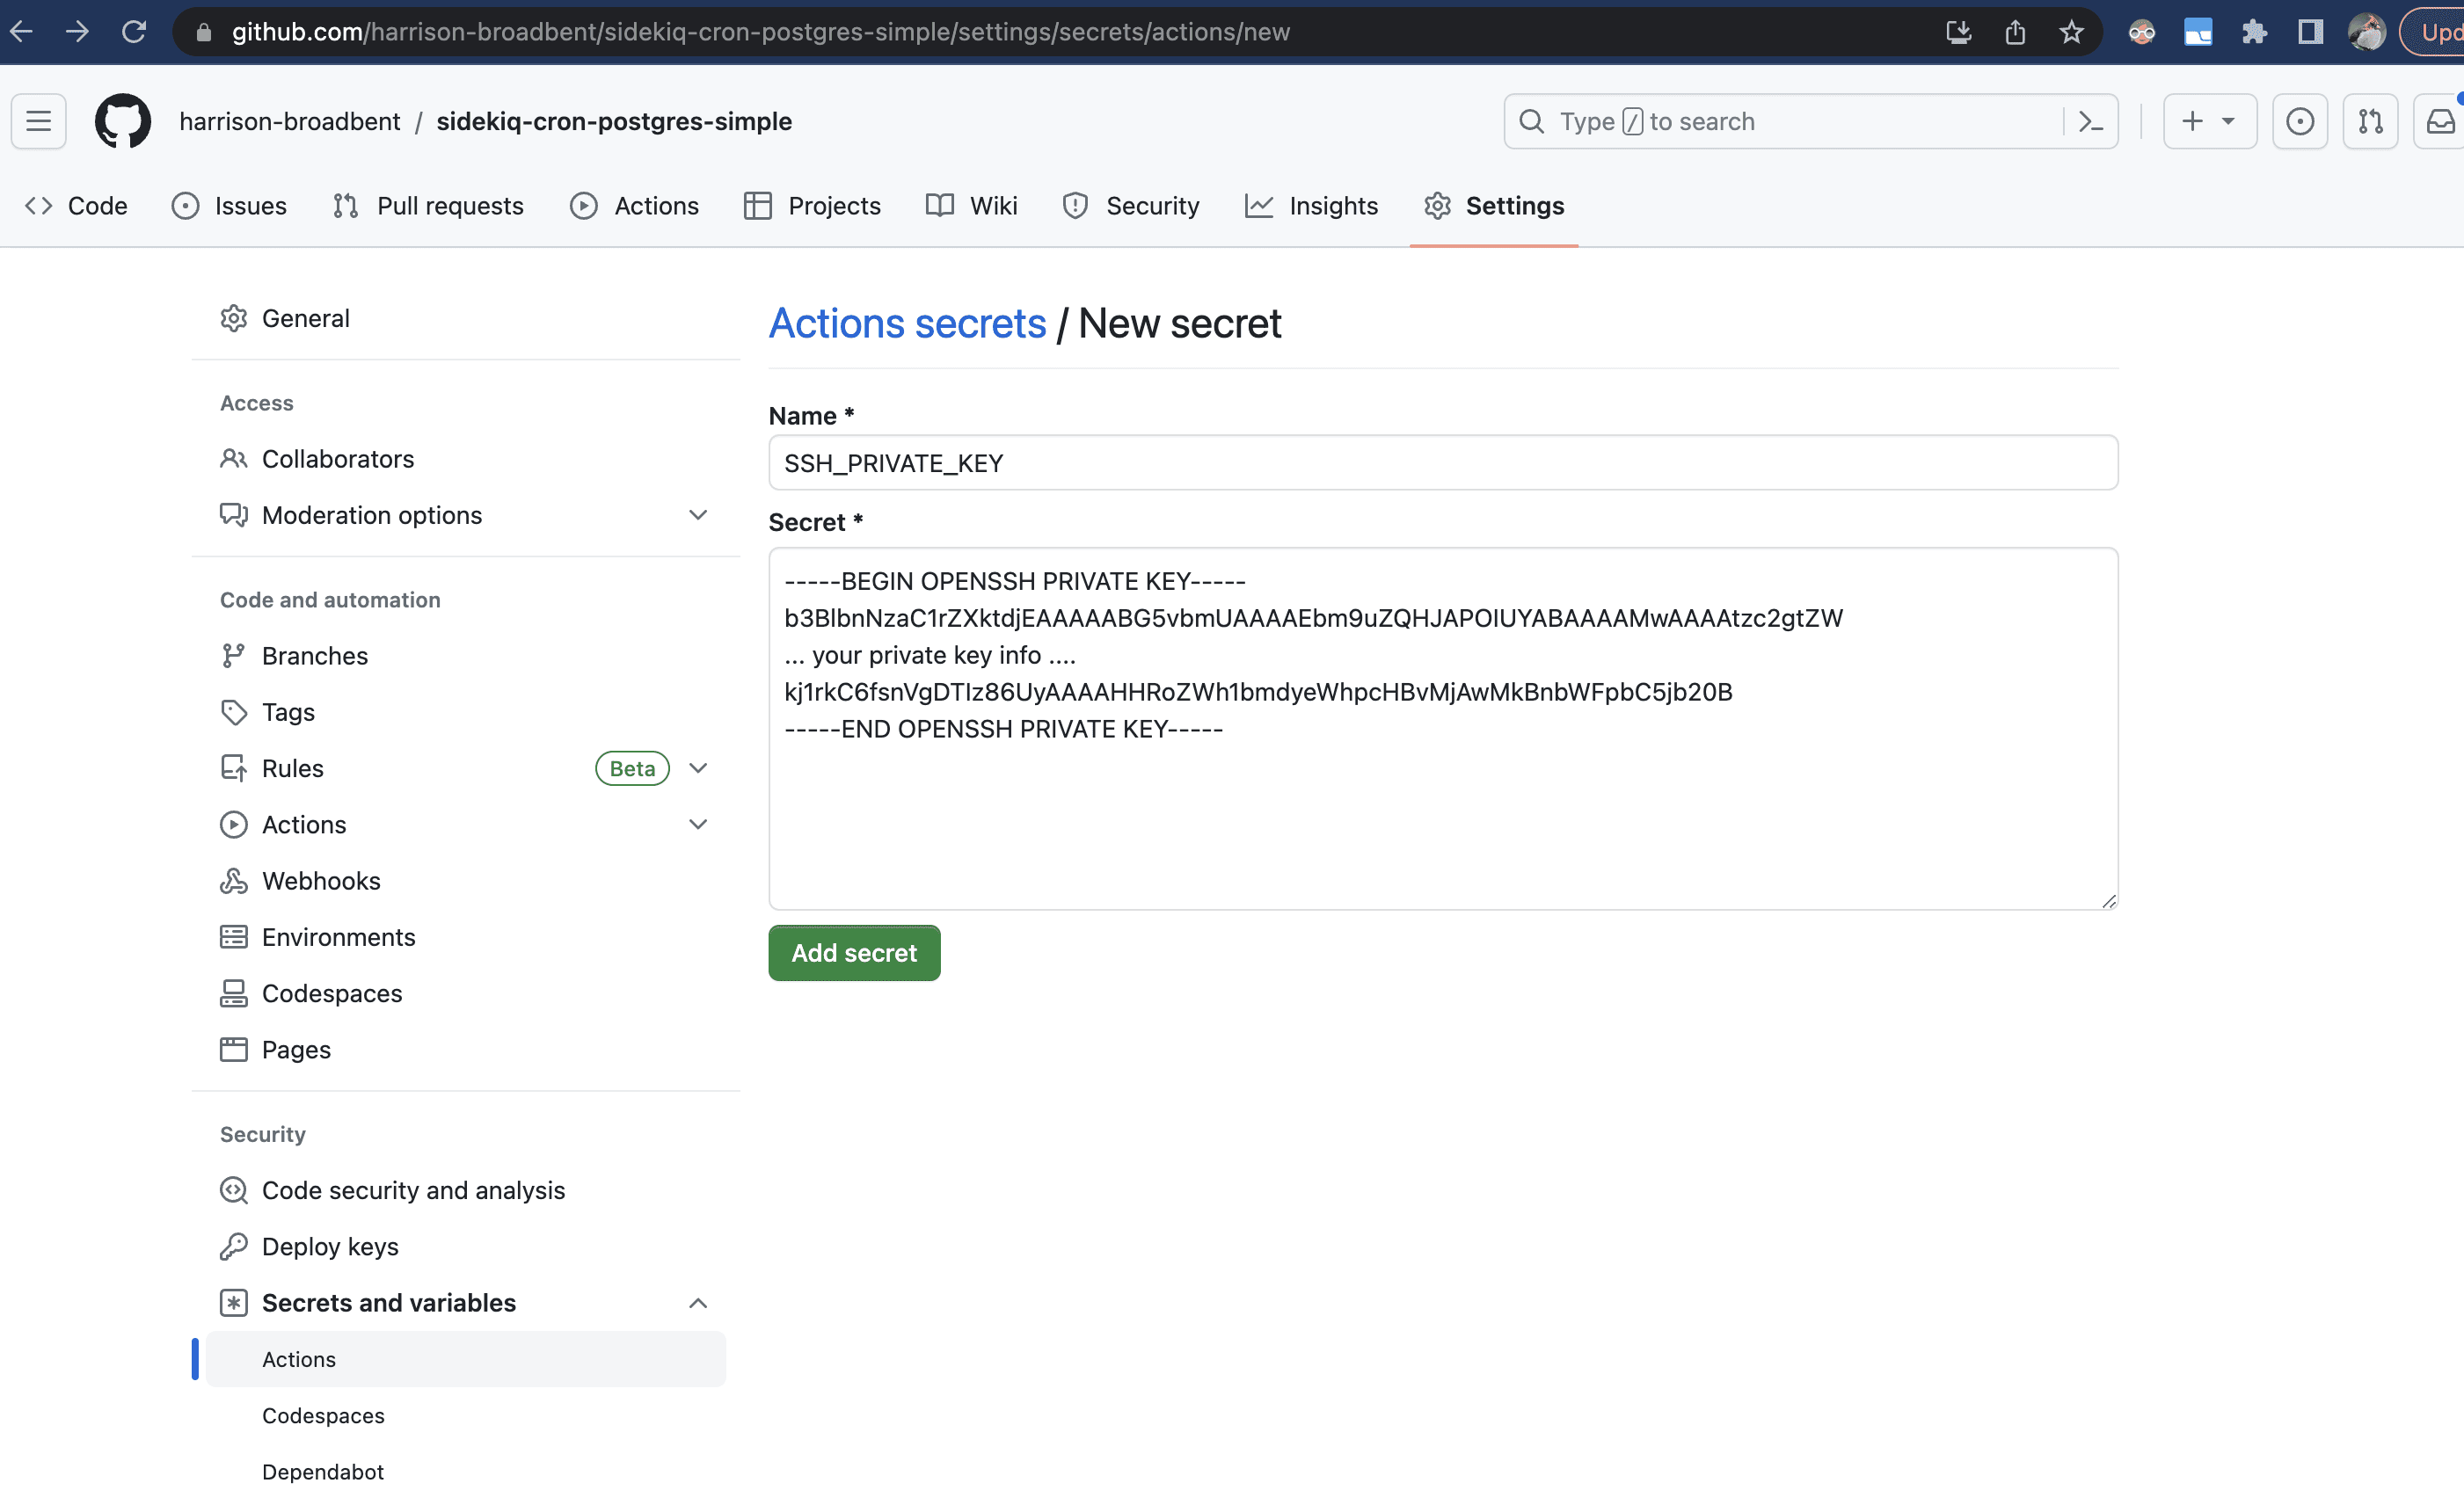
This value should be the private key matching the public key we added to our server.
Since I added the id_ed25519.pub file as my public key, I ran cat ~/.ssh/id_ed25519 to find my matching private key, which looked like this —
-----BEGIN OPENSSH PRIVATE KEY-----
b3BlbnNzaC1rZXktdjEAAAAABG5vbmUAAAAEbm9uZQAAAAAABAABAAAAMwAAAAtzc2gtZW
....more text....
kj1rkC6fsnVgDTIz86UyAAAAHHRoZWh1bmdyeWhpcHBvMjAwMkBnbWFpbC5jb20B
-----END OPENSSH PRIVATE KEY-----
I copied that over to GitHub, which allows our GitHub action to connect to our server and deploy our changes.
Let's give it a go! If you push to your main branch or merge in some code, you'll see something like this —
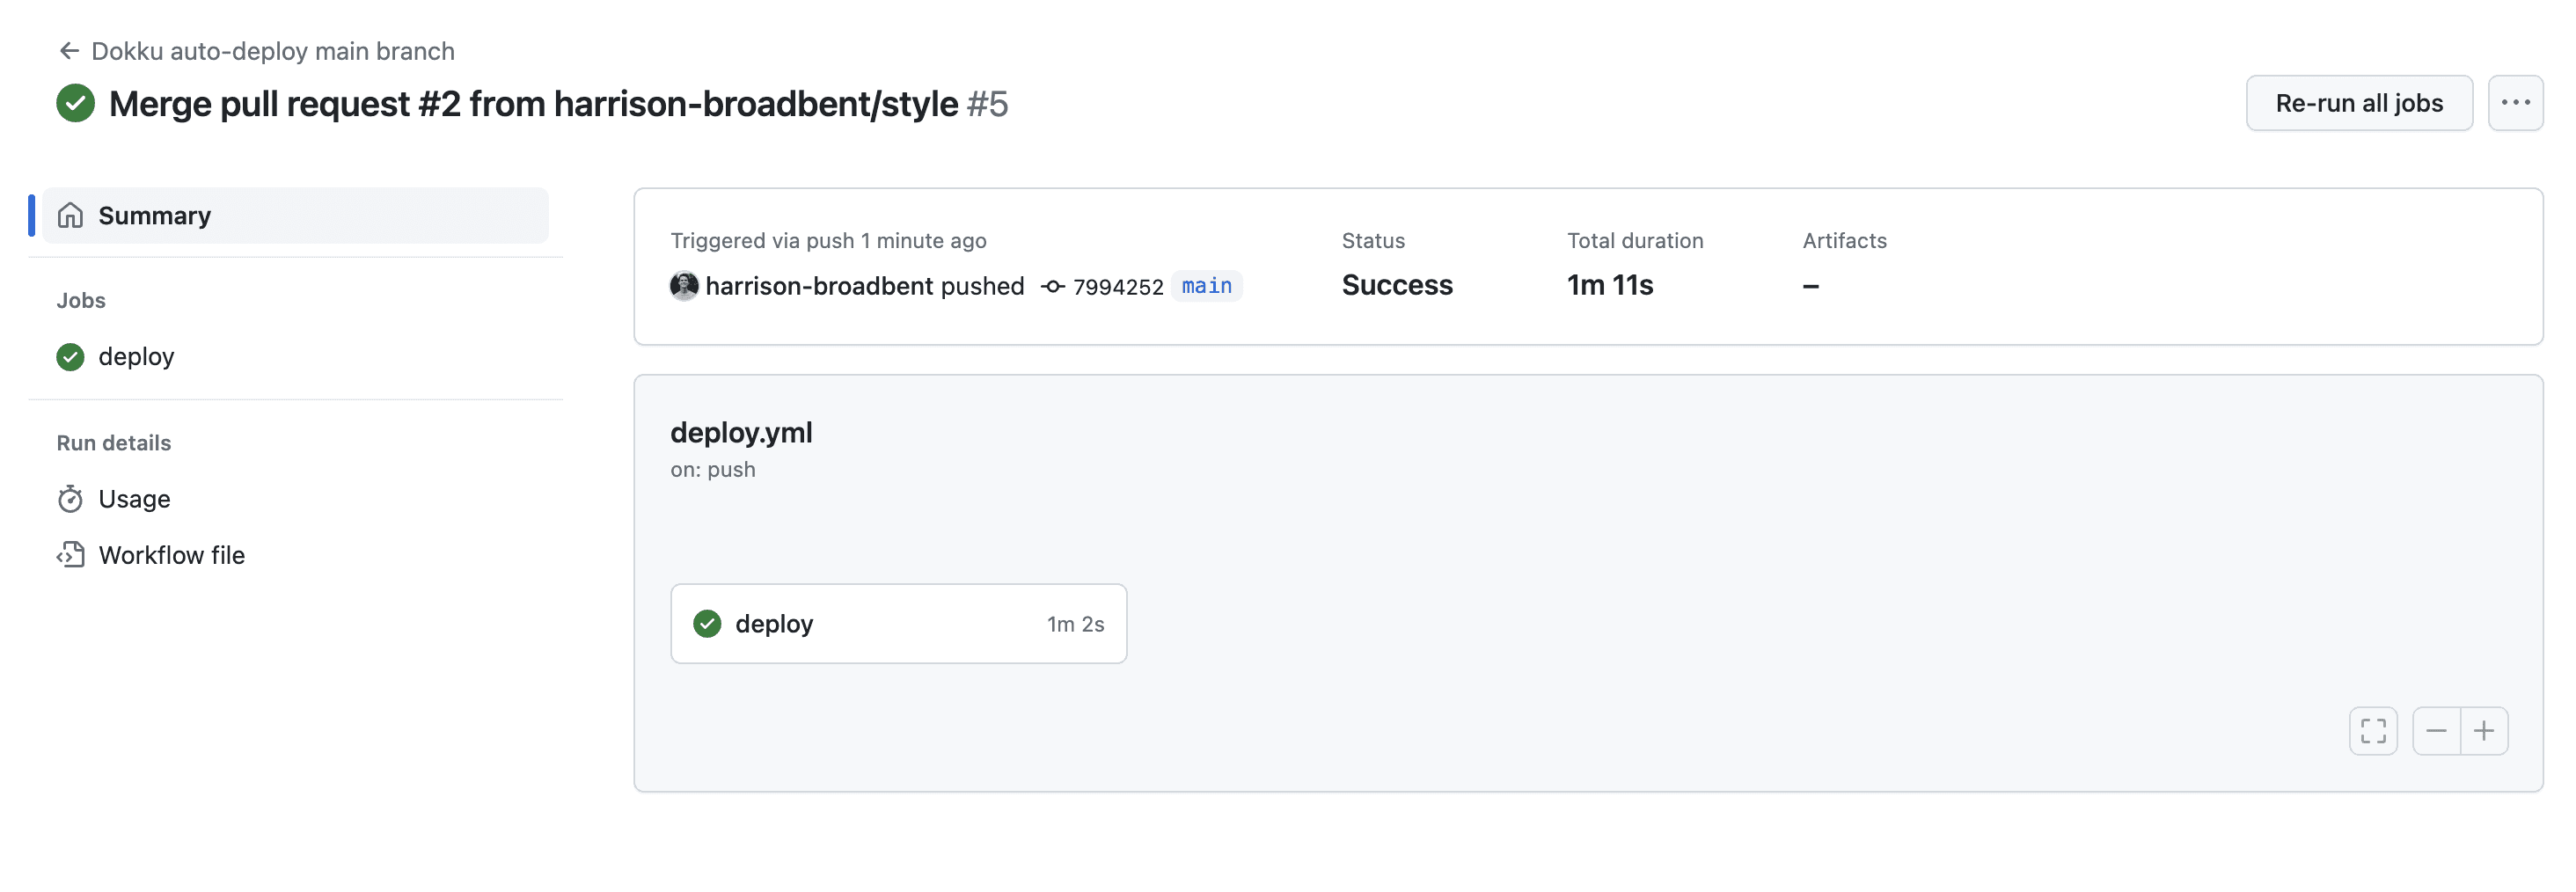
Our GitHub action will trigger a new deployment to Dokku, and the latest version of our Ruby on Rails app will get deployed by Dokku.
You can check out my action runs here - https://github.com/harrison-broadbent/sidekiq-cron-postgres-simple/actions
Conclusion
I hope you found all this information useful!
My motivation for writing this article came from wanting to deploy my own Ruby on Rails app to a VPS — I wanted to take advantage of the great price/performance you get from a VPS over a hosted PaaS like Render or Heroku.
Unfortunately, I found myself having to piece together information from different blogs, the official Dokku docs, and plain trial-and-error (especially the Docker section).
I share this with you now hoping that it will make your life (or job) a little (or a lot!) easier.
If you found any bugs/errors in the code I've provided, please reach out! Likewise, if you have any questions, or if you think an area of this post needs an update.
Other useful links for Dokku / Ruby on Rails deployments -
- Rails Heroku Dokku Migration — pawelurbanek
- Hosting Rails in Dokku — pedroalonso
- Dokku Getting Started
Appendix: Building our sample Ruby on Rails app
Initially while writing this guide, I had us create the sample app before anything else. I decided though to move it into an appendix, since I figured most people reading this article probably have a Ruby on Rails app they want to deploy anyway.
This sample app isn't particularly complex. We have the following —
- A
Postmodel with atitle:string - A PostgreSQL database, and a Redis queue for Sidekiq
- A Sidekiq worker running a job every minute with the
sidekiq-crongem. - The Sidekiq job just creates a
PostwithPost.title = Time.current - We use a
Procfileto define aweb:,worker:, andrelease:process for our Dokku deployment.
Let's start by building our sample app. First, we initialise our app and create the database locally —
rails new sidekiq-cron-postgres-simple --database=postgresql --css tailwind
rails db:create
Then we install the sidekiq and sidekiq-cron gems —
bundle add sidekiq sidekiq-cron
Next we add our Post model, and a PostsController with an #index action. We also run our database migration -
rails g model Post title:string
rails g controller Posts index
rails db:migrate
Let's adjust our PostsController#index method to grab all our posts -
class PostsController < ApplicationController
  def index
    @posts = Post.all
  end
end
And adjust our posts/index.html.erb view to render all our @posts —
<div>
  <h1 class="font-bold text-4xl">All Posts</h1>

  <p class="font-bold text-lg">
    Posts: <%= @posts.size %>
  </p>

  <% @posts.each do |p| %>
    <p><%= p.title %></p>
  <% end %>
</div>
Let's also generate our Sidekiq job -
rails g sidekiq:job sidekiqPost
and inside it, we'll add some code to create a new Post -
class SidekiqPostJob
  include Sidekiq::Job

  def perform(*args)
    p = Post.new
    p.title = Time.current
    p.save
    puts "saved post", p
  end
end
We also need to adjust config/application.rb to enable Sidekiq -
module SidekiqCronPostgresSimple
  class Application < Rails::Application
    ...
    config.active_job.queue_adapter = :sidekiq
    config.active_job.queue_name_prefix = "sidekiq_cron_postgres_simple_production"
  end
end
Finally, we need to add 3 config files — our cron job's schedule.yml, Sidekiq's sidekiq.yml, and a Procfile.
touch config/sidekiq.yml config/schedule.yml Procfile
The sidekiq-cron gem we installed earlier uses the schedule.yml file to run our jobs at the correct interval —
# config/schedule.yml

sidekiq_post_job:
  cron: "*/1 * * * *"
  class: "SidekiqPostJob"
  queue: default
We use a sidekiq.yml file to initialize Sidekiq -
---
:concurrency: <%= ENV.fetch("RAILS_MAX_THREADS") { 4 } %> # make sure less than database.yml pool size
:queues:
  - default
And finally, and most importantly, we need to add a Procfile to our Rails app. Our Procfile is based on the Heroku Procfile and specifies processes we want Dokku to run when it boots our app.
Our Rails app will already have a Procfile.dev since we generated our app with the --css tailwind flag. When you run ./bin/dev, Rails runs the Procfile.dev in the background.
We need to create a second file, simply named Procfile, which will be for production. It should look like this —
web: bundle exec puma -C config/puma.rb
worker: bundle exec sidekiq -C config/sidekiq.yml
release: bundle exec rails db:migrate
If you want to learn more about Procfiles and
Procfile.dev, I've written about it here — Procfile.dev, bin/dev, and Rails 7.
In our Procfile, we create a web process which runs puma, and a worker process which runs sidekiq, using their config files.
We also define a release step. I'll discuss the Procfile more soon, but essentially the release command is run after our app is built. Here, we've got it set up to run our database migrations automatically after each build.
So we've got our app ready — let's run it locally first to make sure it's working.
We need to adjust our Procfile.dev to run our development resources —
web: bin/rails server -p 3000
css: bin/rails tailwindcss:watch
redis: redis-server
sidekiq: bundle exec sidekiq -C config/sidekiq.yml
Then, run our development environment with -
./bin/dev
and if we visit localhost:3000/posts/index, we should see our app running —

Perfect!
Now you can jump back up to the deployment sections, and have a go at deploying this Ruby on Rails app with Dokku.
Update log
2 July 2023
After posting this article to Hacker News (https://news.ycombinator.com/item?id=36548621#36549367), I received a great comment from josegonzalez, a Dokku maintainer —
Dokku Maintainer here! Awesome post! I'm reading through it and this struck me as odd:
For buildpack-based deployments, the location of the app.json file should be at the root of your repository. Dockerfile-based app deploys should have the app.json in the configured WORKDIR directory; otherwise, Dokku defaults to the buildpack app behaviour of looking in /app.
Thats definitely incorrect now, and was changed in 0.30.0[1] but I neglected to update the docs. I'll get that sorted out now.
The
Procfilereleaseprocess is there to emulate Heroku'sreleaseprocess support.The cron support in
app.jsondoes not support running dokku commands, so folks cannot schedule postgres backups in there without doing something spooky/not recommended.[1] https://dokku.com/docs/appendices/0.30.0-migration-guide/
In response, I've adjusted the Doku post-deploy scripts section of this article to correctly describe adding an app.json file to your Ruby on Rails project, in line with the updated docs.
I also added some clarification around the Procfile, in terms of it's relation to Heroku.
I also removed the section in regular database backups to S3, where I described using the app.json file to schedule cron tasks. It seems that we cannot use the cron scheduling functionality of the app.json file to schedule dokku commands.
28 October 2023
Thank you to Maxence Robinet for notifying me of some outdated Dokku commands. I've updated the docs with his suggestions, so this article should be valid for the latest versions of Dokku.