- Published on
- ← Blog——
Learn Hotwire by building the simplest possible Hotwire and Ruby on Rails app — a beginners guide.
- Authors

- Name
- Harrison Broadbent
- @hrrsnbbnt
You probably dont need a React or Vue frontend. With a few (3) lines of code, you can build a live frontend for your Ruby on Rails app. This is what we're building today ↓
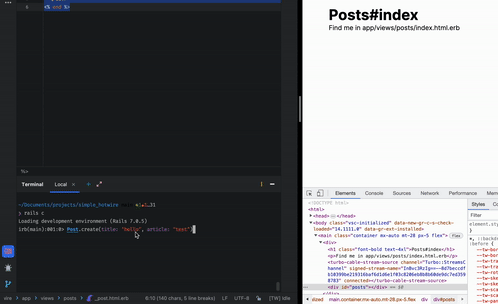
Table of Contents
- 0. Getting Ruby and Rails installed
- 1. Creating our basic Rails App
- 2. Hotwiring, Streaming and Turbo-Framing our App
- Adding a broadcast to our Post model
- Refactoring our Views
- So... what's actually going on?
- How does the frontend know what to update?
- A more advance Turbo Streams example
- Segment Turbo Streams by User
- Broadcasting to multiple streams
- A bit more on naming
- Conclusion
Hotwire is a (relatively) new part of Ruby on Rails that allows your Rails frontend to update live and in realtime — in many cases, totally replacing a frontend framework like React or Vue.
Under the hood, Hotwire uses Action Cable to send messages to the frontend (called broadcasts). There are lots of ways to send broadcasts — today, we're going to focus on automatically sending them when our Post model gets created, updated, deleted.
In the past, I've used Hotwire to power my frontends, and it's been great. With a couple of brodcasts_to lines in my models, and a few turbo_stream_from helpers in my views, I can build live UIs without any sort of Javascript framework. Just pure Rails, Hotwire and ERB.
So why did I write this guide? The existing resources for Hotwire are pretty confusing, especially for a Hotwire or Rails beginner. This article is for the Hotwire beginner, and is the simplest possible introduction to Hotwire. We're going to build the most stripped-back app possible. Our only focus is using Hotwire in our Ruby on Rails app for live frontend updates.
Note how I said "Hotwire beginner", not "Ruby on Rails beginner" — this isn't a Ruby on Rails tutorial. It's a simple tutorial though, so you can still follow along. However, if you've never used Ruby on Rails before, I think it's best you turn elsewhere until you know the basics of
Models, Views, Controllers & Routes.
We're going to build the simplest Ruby on Rails app I could come up with, which integrates Hotwire for live frontend updates.
Let's get started!
0. Getting Ruby and Rails installed
If you haven't already installed Ruby and Rails, you can check out the RailsGirls Guide to Installing Ruby on Rails to get started.
I recommend you install the latest versions of Ruby and Rails.
At the time of writing, I was using the following -
❯ ruby --version && rails -v
ruby 3.2.0 (2022-12-25 revision a528908271) [arm64-darwin22]
Rails 7.0.5
1. Creating our basic Rails App
This first section is all about getting a simple app set up, ready for us to start Hotwiring together in part 2.
We're going to create a Rails app with a single model, Post, and a single route, post#index. To create new Posts, we will use the Rails console. All our frontend will do is display each Post.
To start, let's create our app, models and controllers —
rails new simple_hotwire --css tailwind && cd simple_hotwire
rails generate model Post title:string article:string
rails db:migrate
rails generate controller Posts index
These commands create our new Rails app, simple_hotwire, as well as our Post model. It also runs our database migrations, and creates our PostsController.
You might notice that we specify --css tailwindcss in our rails new command. I can almost hear you asking — why is that?
Although TailwindCSS looks great, that's actually not the reason we're including it (this guide is meant to be as simple as possible, remember?).
It's actually because including TailwindCSS automatically creates a ./bin/dev script in our Rails project, and a Procfile.
The Procfile is important, because it makes it easy for us to run a few things in parallel. Hotwire requires redis to be running, and a Procfile makes it really easy for us to get it running.
If you want to dive deeper into the
Procfile.devandbin/devscript, I wrote more about them here — Procfile.dev, bin/dev, and Rails 7.
Let's do it now.
Add redis to your Procfile -
web: bin/rails server -p 3000
css: bin/rails tailwindcss:watch
redis: redis-server
As long as you have redis installed, that's all you need to do! Rails already knows how to talk to redis, and how to use it for Hotwire broadcasts and updates.
If you haven't already got Redis installed, I wrote a short guide about it here — Adding Redis and Sidekiq to your Ruby on Rails app
Now we can start the development server and run our app.
Start the development server by running ./bin/dev. You will see something like this —
08:44:17 web.1   | started with pid 22853
08:44:17 css.1   | started with pid 22854
08:44:17 redis.1 | started with pid 22855
08:44:17 redis.1 | 22855:C 25 May 2023 08:44:17.675 # oO0OoO0OoO0Oo Redis is starting oO0OoO0OoO0Oo
08:44:17 redis.1 | 22855:C 25 May 2023 08:44:17.675 # Redis version=7.0.11, bits=64, commit=00000000, modified=0, pid=22855, just started
08:44:17 redis.1 | 22855:C 25 May 2023 08:44:17.675 # Warning: no config file specified, using the default config. In order to specify a config file use redis-server /path/to/redis.conf
08:44:17 redis.1 | 22855:M 25 May 2023 08:44:17.675 * monotonic clock: POSIX clock_gettime
08:44:17 redis.1 | 22855:M 25 May 2023 08:44:17.677 * Running mode=standalone, port=6379.
08:44:17 redis.1 | 22855:M 25 May 2023 08:44:17.677 # WARNING: The TCP backlog setting of 511 cannot be enforced because kern.ipc.somaxconn is set to the lower value of 128.
08:44:17 redis.1 | 22855:M 25 May 2023 08:44:17.677 # Server initialized
08:44:17 redis.1 | 22855:M 25 May 2023 08:44:17.677 * Ready to accept connections
08:44:18 web.1   | => Booting Puma
08:44:18 web.1   | => Rails 7.0.5 application starting in development
08:44:18 web.1   | => Run `bin/rails server --help` for more startup options
08:44:18 web.1   | Puma starting in single mode...
08:44:18 web.1   | * Puma version: 5.6.5 (ruby 3.2.0-p0) ("Birdie's Version")
08:44:18 web.1   | *  Min threads: 5
08:44:18 web.1   | *  Max threads: 5
08:44:18 web.1   | *  Environment: development
08:44:18 web.1   | *          PID: 22853
08:44:18 web.1   | * Listening on http://127.0.0.1:3000
08:44:18 web.1   | * Listening on http://[::1]:3000
08:44:18 web.1   | Use Ctrl-C to stop
08:44:18 css.1   |
08:44:18 css.1   | Rebuilding...
08:44:19 css.1   |
08:44:19 css.1   | Done in 200ms.
You can see that web.1, redis.1, css.1 are all up and running without errors.
Now we have our development server running. If you open up localhost, you'll see the Rails splash screen —
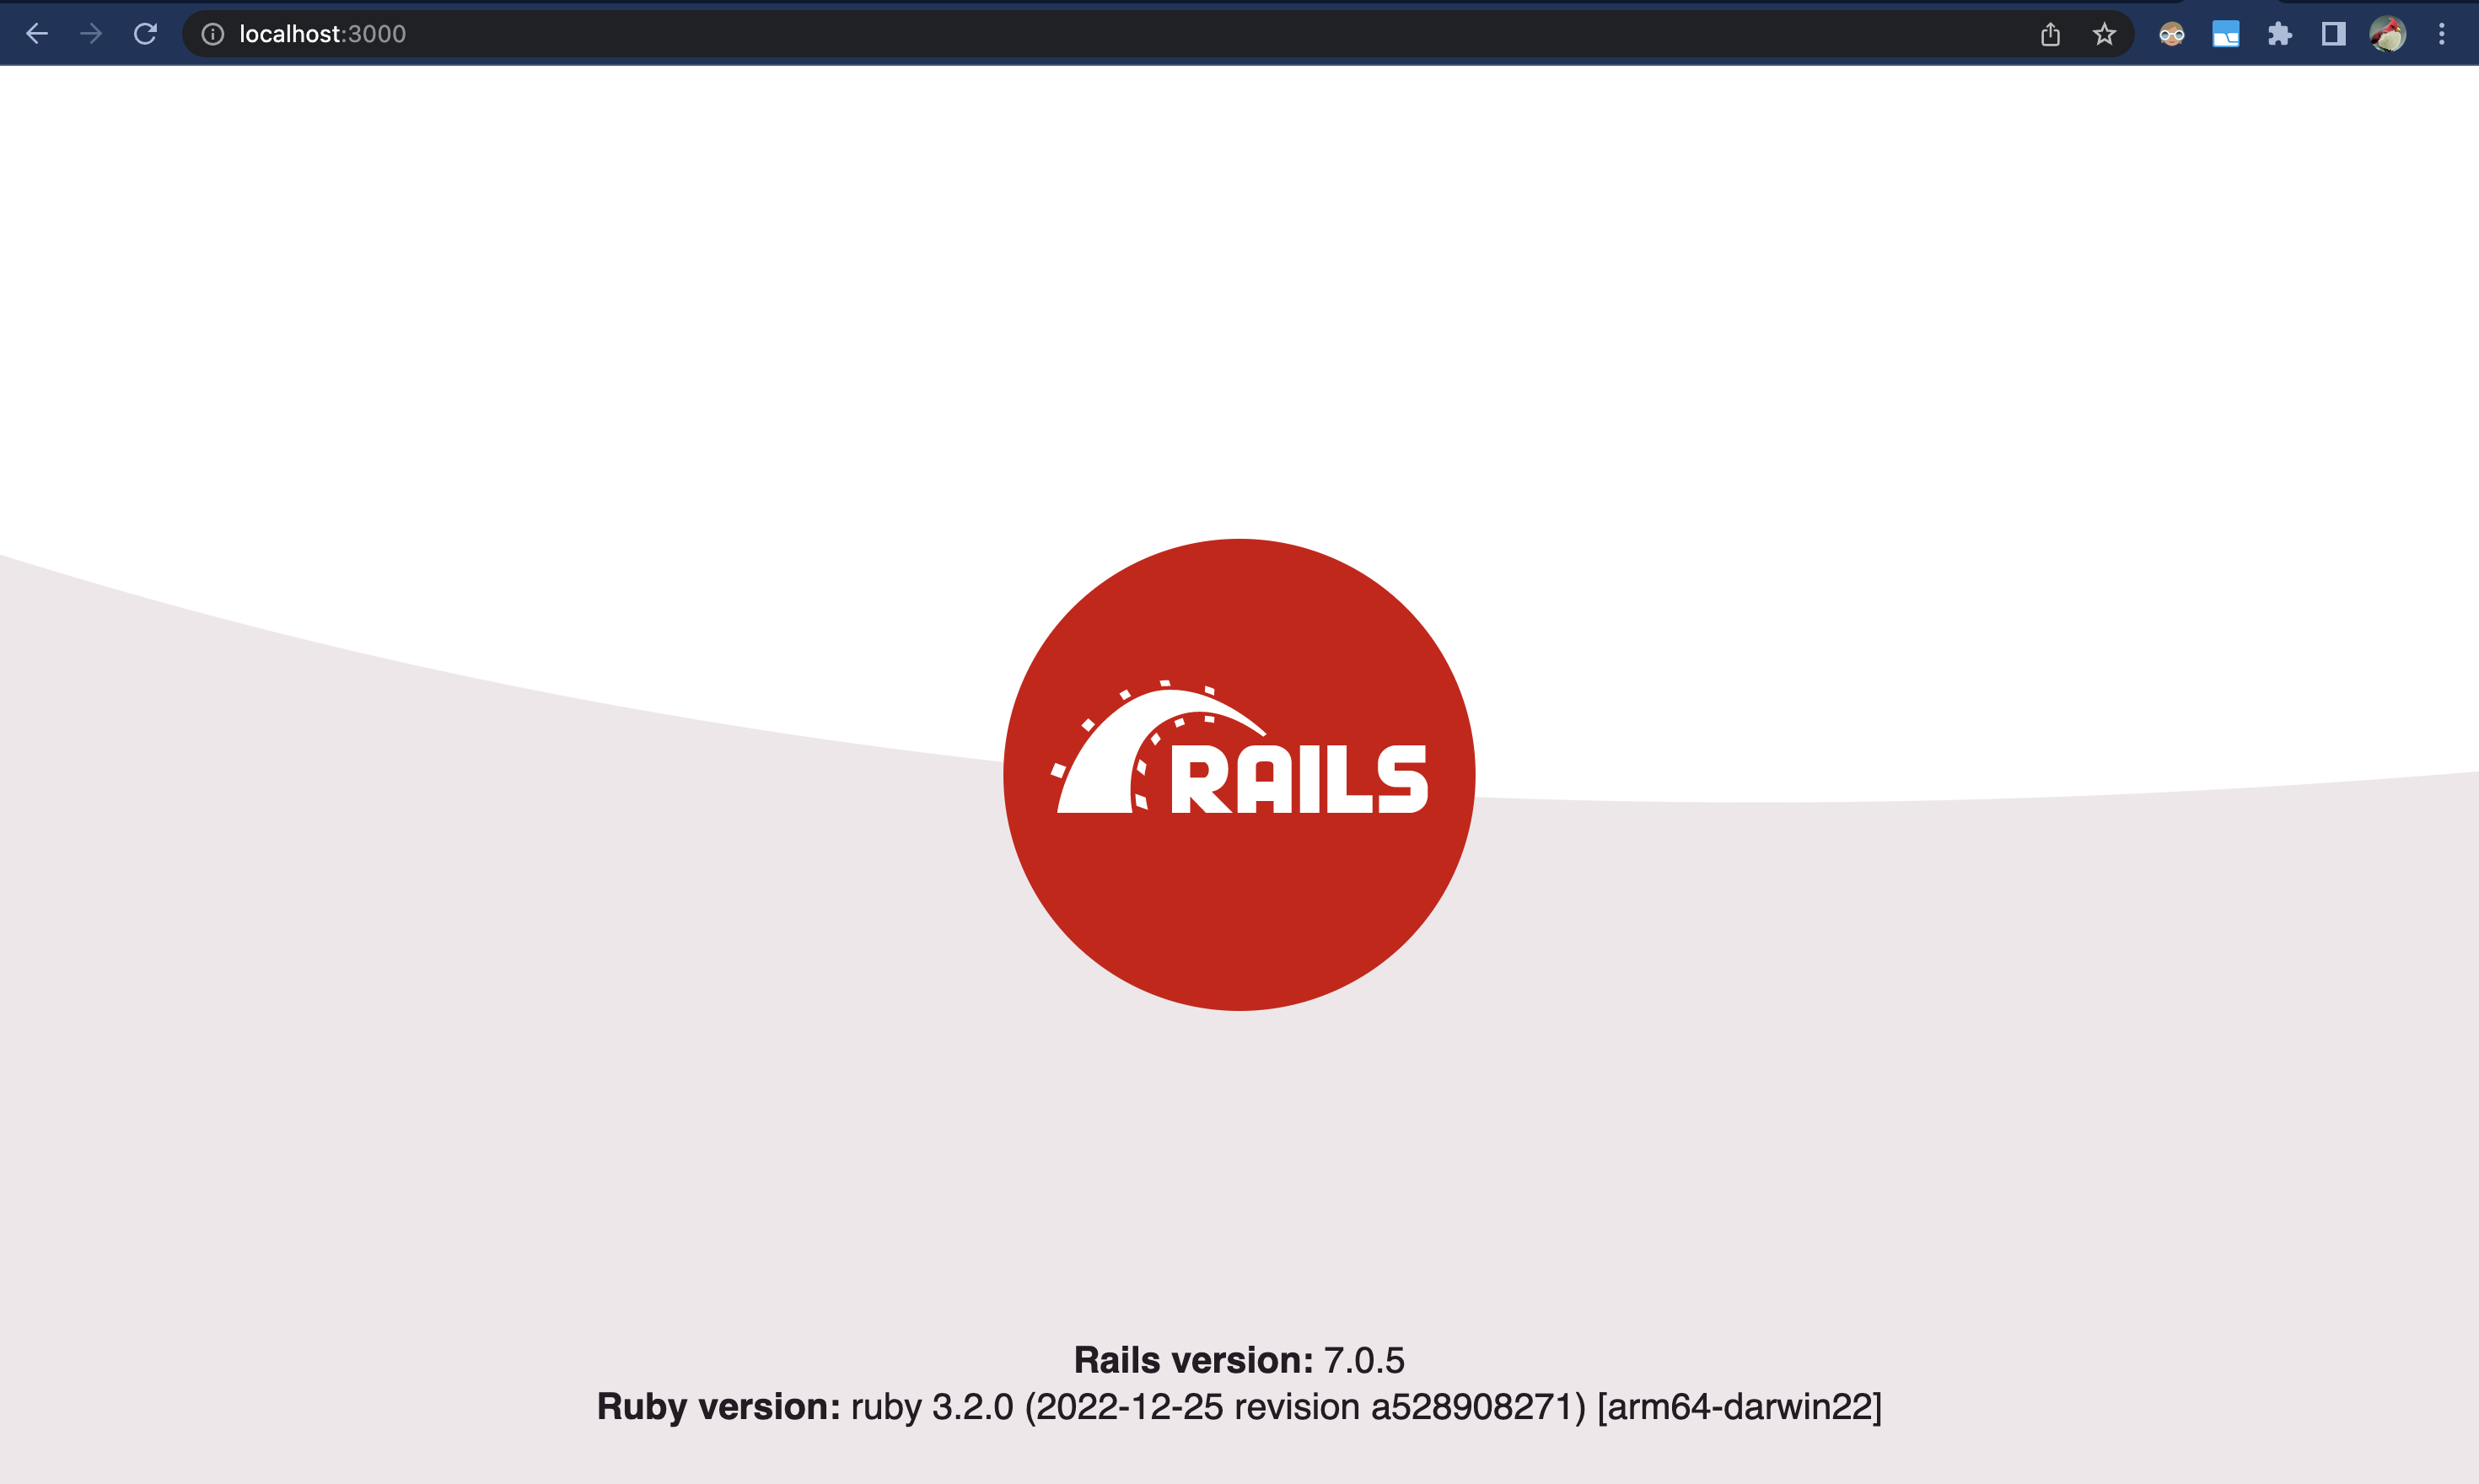
Our app is running!
Our next step is to adjust our controllers and views. This will give us a basic app that we can start to Hotwire together.
We're going to start with out controllers — open controllers/posts_controller.rb. You will see an index method that we automatically generated earlier.
Let's adjust the index method to collect all our Post records -
class PostsController < ApplicationController
  def index
    @posts = Post.all
  end
end
Now we can adjust views/posts/index.html.erb to render all our @posts —
<div>
  <h1 class="font-bold text-4xl">Posts#index</h1>
  <p>Find me in app/views/posts/index.html.erb</p>
  <% @posts.each do |post| %>
    <div class="border flex-col mt-2">
        <%= post.title %>
        <%= post.article %>
    </div>
  <% end %>
</div>
Feel free to play with the styling — All I've done is add the bare-minimum so we can distinguish our Posts apart.
Now that we've got our controller and view set up, we should be good to give our app a bit of a test!
If you reload our app.... you still wont see anything!

Oops. We need to create a Post record —
You can create a new Post record by opening up the Rails console, and running the following -
rails c

# inside Rails console run -
Post.create(title: 'hello', article: 'test')
Back in your browser, reload the page and you should see something like -
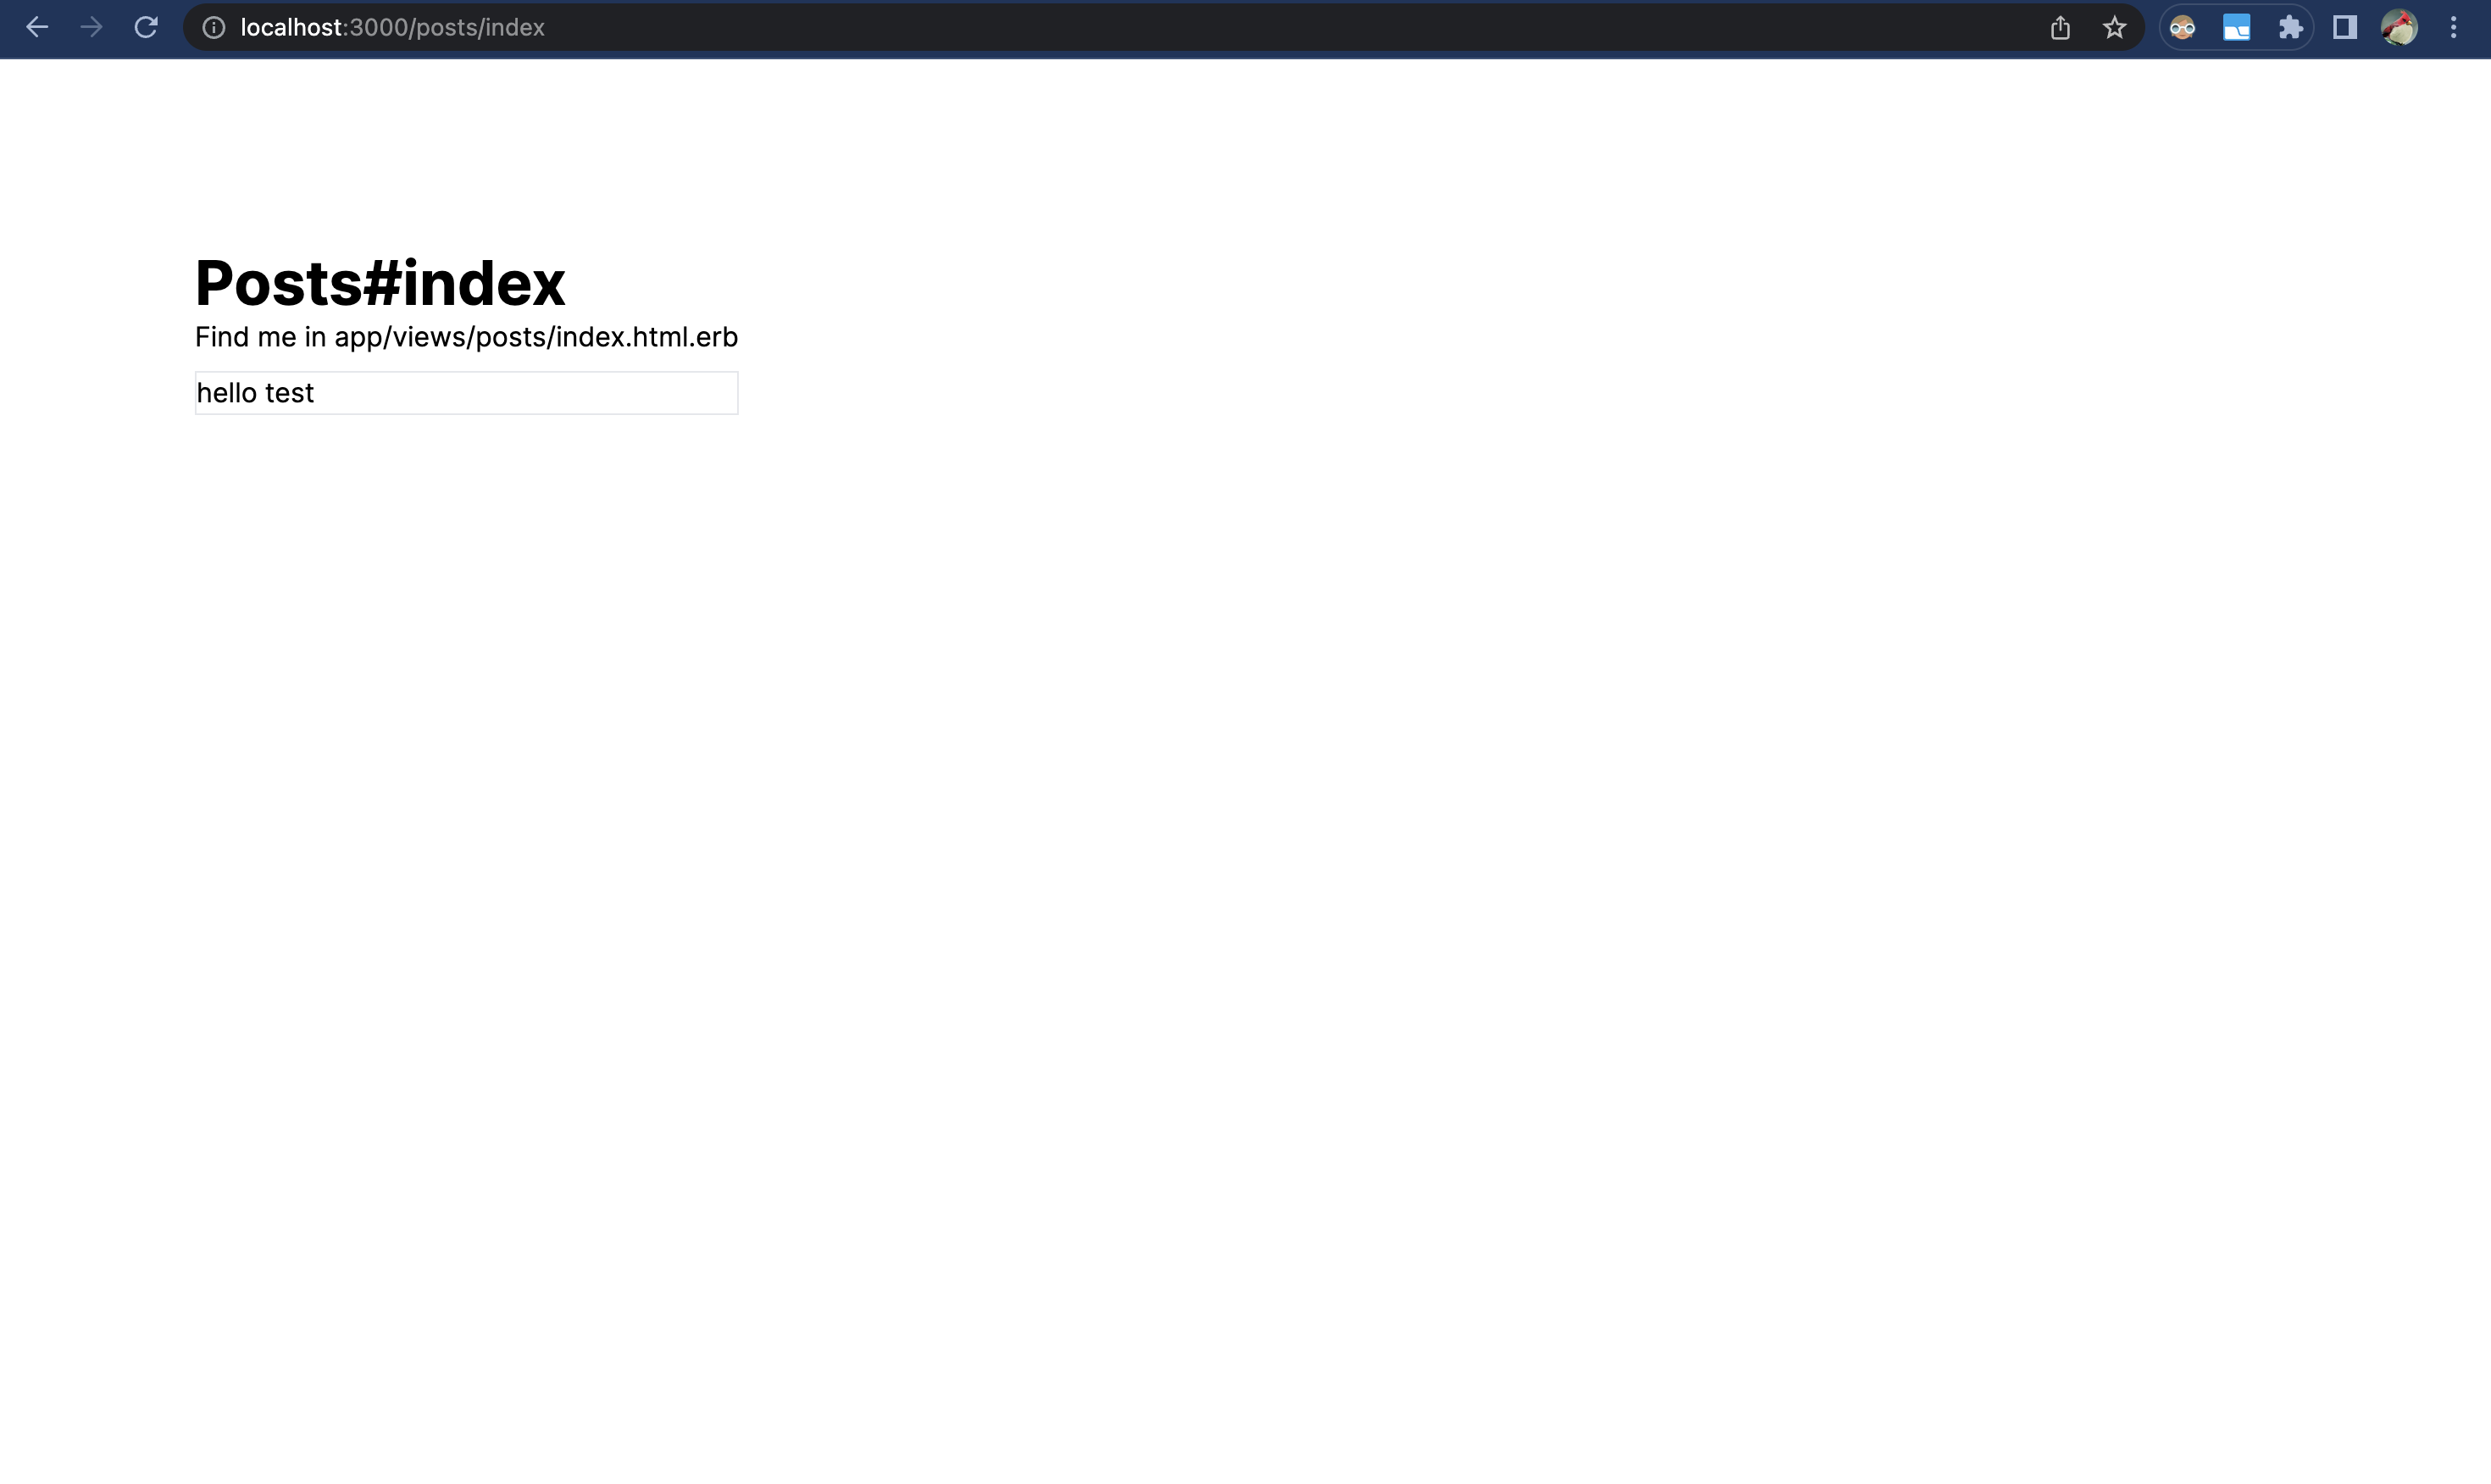
Step 1 is done!
Our Rails scaffold app is ready for Hotwiring, and we have a way of creating and displaying posts.
Now, we're going to start Hotwiring everything together. When we're finished, our frontend will update immediately after we create or destroy a Post — no reloading required, like this —
2. Hotwiring, Streaming and Turbo-Framing our App
Finally! Let's dive into Hotwire.
Rails 7 already comes with lots of things already setup for us.
It means that now, most of the hard work is already done for us -
- Redis is already setup and running in our Procfile, and Rails knows how to start using it without us needing to adjust anything.
- ActionCable is already configured in
config/cable.yml, and will connect to our redis instance automatically (as long as we are using the default redis config), - Stimulus, which handles the frontend side of things, is already setup and running in
app/javacript/controllers. - Turbo, which let's us create
turbo_streamsandturbo_frames, is also already setup and ready for us to use.
With everything already setup for us, there's only a couple of small steps to connect everything, and start updating our Rails frontend live with Hotwire and Turbo streams.
Adding a broadcast to our Post model
The first (and only) thing we're going to do in our Post model is add the line below -
class Post < ApplicationRecord
  broadcasts_to -> (post) { :posts }
end
That's it!
This is telling our model to create a broadcast whenever it gets either created, updated, deleted. We specify a specific stream we want it to broadcast to, called :posts. :posts isn't special — it's just a plain Ruby symbol.
Theres a lot more to this broadcasts_to command though. So many things, in fact, that I recommend you give the Official Hotwire GitHub Documentation — broadcastable.rb a read.
The official GitHub docs really helped me to peel back the onion on what broadcasts_to actually does.
For now though, we're going to move on to our views.
Refactoring our Views
We need to make a few adjustments to our views to make them play nicely with Hotwire and Turbo.
The first thing we need to do is extract our Post list item into it's own partial —
Create app/views/posts/_post.html.erb -
# partial for a single post
<div class="border flex-col mt-2">
  <%= post.title %>
  <%= post.article %>
</div>
Now we can refactor posts/index.html.erb to render our collection of @posts directly —
<div>
  <h1 class="font-bold text-4xl">Posts#index</h1>
  <p>Find me in app/views/posts/index.html.erb</p>
  <%= render @posts %>
</div>
We still haven't changed anything yet. That was just a bit of refactoring using the built-in helpers and syntactic sugar provided by Rails.
Now, finally, let's add in a Turbo stream helper tag to our index view -
<div>
  <h1 class="font-bold text-4xl">Posts#index</h1>
  <p>Find me in app/views/posts/index.html.erb</p>

  <%= turbo_stream_from :posts %>
  <div id="posts">
    <%= render @posts %>
  </div>
</div>
And a turbo_frame_tag into our _post partial —
<%= turbo_frame_tag dom_id(post) do %>
  <div class="border flex-col mt-2">
    <%= post.title %>
    <%= post.article %>
  </div>
<% end %>
If you can believe it, that's everything!
Restart the ./bin/dev server and your rails console. Then, inside the console run —
Post.create(title: 'hello', article: 'test')
And the UI will update live! Add a few more, and you should see them continue to stream in live to the frontend.
If you've created a few too many, then you can also remove them all by running —
Post.destroy_all
to clear the list. And of course, this will also run live.
That's it! The most basic Ruby on Rails + Hotwire app I could come up with.
We were able to accomplish a lot with only ~3 extra lines of code! There was a lot of Rails magic going on behind the scenes there — if you're interested in digging into the details a bit and learning more about what's actually happening, then read on!
So... what's actually going on?
That was pretty exciting! We were able to add live frontend updates into our Rails app with a total of 3 extra lines of code. 🤯
But there was also a lot of magic involved. Lot's of things seem to automatically worked together.
So let's dive into the details a bit more, to see if we can understand what's going on behind the scenes a bit.
If you were watching your bin/dev logs, you would've noticed that every time we created a Post, we saw something like this -
Performing Turbo::Streams::ActionBroadcastJob (Job ID: cdd1910e-9711-464e-8c83-40afafbf8cf1)
from Async(default) enqueued at 2023-05-25T03:00:22Z with
arguments:"posts", {:action=>:append, :target=>"posts", :targets=>nil,
:locals=>{:post=>#<GlobalID:0x0000000109c66f60 @uri=#<URI::GID gid://simple-hotwire/Post/24>>}, :partial=>"posts/post"}
Theres a lot of important stuff happening here!
The key things are arguments: 'posts' :target, :action , :locals and :partial.
arguments: 'posts'is indicating which stream to broadcast the changes into, and we specified this stream back in our model when we wrote —We told ourclass Post < ApplicationRecord broadcasts_to -> (post) { :posts } endPostmodel to broadcast all it'screate,updateanddeletechanges, and we told it to broadcast them to:posts. This defined the name of the stream from the model side, which is why we see it again in theTurbo::Streams::ActionBroadcastJob:target => 'posts'is indicating where ourActionBroadcastJobshould perform it's:action. In this case, it's going to look for a 'posts' target to:appendto.- Note how we have
:target=>"posts", :targets=>nil,— you might be wondering what's going on. Other actions, likedestroybelow, target a specific post to perform their:actionon. However, since we're creating a new element on the frontend, we don't have a specific element to target.:target=>'posts'actually corresponds to the<div id="posts">element that we created inindex.html.erb. Hotwire is actually looking for an element with that ID, and then will append to it with the appropriate:locals.
- Note how we have
:localscontains information for the specific action. Since we're creating a newpost, we store information about the post in:locals[:post], and then we also store the partial to render our post into as:locals[:partial].
Since we named everything correctly, Hotwire was able to stream it's updates into the right stream, using the right partial, and target the right <div>. (More on how Rails automatically infers the names further down, if you're interested.)
When we run Post.destroy_all, we see a different looking broadcast —
Turbo::StreamsChannel transmitting
"<turbo-stream action=\"remove\" target=\"post_18\"></turbo-stream>"
(via streamed from posts)
In this case, we transmit the :remove action, and the specific target, to the 'posts' channel. No other information is needed to carry out this action.
How does the frontend know what to update?
All those broadcasts are cool, but how does the frontend know what to update?
We told our frontend to watch the :posts stream when we added this line —
<%= turbo_stream_from :posts %>
If you open your browser , and go to index.html and open the developer inspector tools, you'll see an element like this in place of the <%= turbo_stream_from :posts %> tag —

<turbo-cable-stream-source
channel="Turbo::StreamsChannel"
signed-stream-name="InBvc3RzIg==--8d7beccdfb10399be219316baf6d1d6e1f03c8206eb8b8b60de9dc7ed3598783"
connected=""
></turbo-cable-stream-source>
This element corresponds to our :posts stream, and tells the frontend to watch that stream for updates. In the case of creating a new Post, the id on the <div id="posts"> is also used, as the :target, like we mentioned before.
In the case of update and remove actions, which have specific :targets like "post_25" , the tag we defined inside the post partial is used -
<%= turbo_frame_tag dom_id(post) do %>
This creates the following HTML -
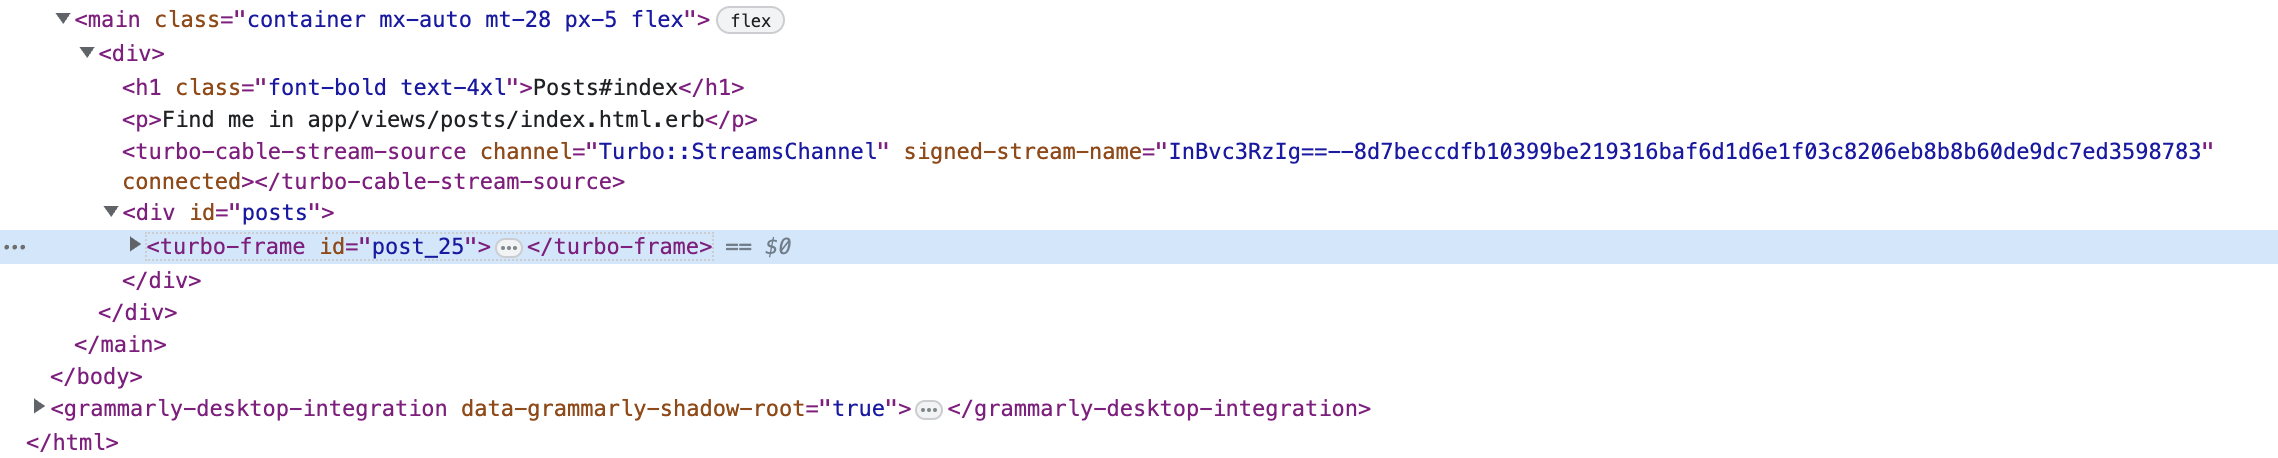
The id acts as an identifier, and matches with the target from the broadcast jobs. dom_id is a really helpful and versatile way of creating these ids — you can read more about it here BoringRails — dom_id
That's a pretty thorough overview of what's going on behind the scenes when we use broadcasts_to and turbo_stream_from.
Want a more advanced example?
A more advance Turbo Streams example
Heres some more advanced examples of Turbo Streams in action, extracted from a side-project of mine called MONN. MONN helped you to monitor your cloud infrastructure, and was modelled on Services, Deployments, Pings.
Inside MONN, I used Hotwire to build a realtime frontend, in place of a frontend framework like React.
Segment Turbo Streams by User
You don't want to be seeing data intended other users, so we segmented our Turbo streams by user_id. For instance, inside the Ping model, we had this —
class Ping < ApplicationRecord
...
broadcasts_to ->(ping) {
[:ping, ping.service_id, ping.user.id]
}, inserts_by: :prepend
We create a custom channel by combining the raw symbol :ping with the corresponding service_id and user.id. This lets us create streams that look like ping:37:1 (ping:service_id:user.id), so we can stream data for a specific user.
You might have noticed we also use inserts_by: :prepend — this tells our frontend to add new Ping items to the start of their list container, rather than the end. This makes sure our users see their most recent pings first.
When we create a new Ping model, we see logs like ths inside our database —
Enqueued Turbo::Streams::ActionBroadcastJob (Job ID: 5d0d73db-a855-4fe7-948f-2c2154d86763) to Sidekiq(default)
with arguments: "ping:37:1", {:action=>:prepend, :target=>"pings", :targets=>nil,
:locals=>{:ping=>#<GlobalID:0x00000001133d97d0 @uri=#<URI::GID gid://monn/Ping/155>>}, :partial=>"pings/ping"}
It's very similar to the earlier broadcast jobs from our Post model. The key difference is the with arguments: "ping:37:1", indicating the channel we specified in our model, and the :action=>:prepend.
On the frontend side, in our views, we construct the turbo stream like this —
<%= turbo_stream_from [:ping, service_id, current_user.id] %>
Which matches with the stream from our model.
Broadcasting to multiple streams
Rails also lets us specify multiple streams for us to broadcast into.
For example, our Deployment model streams into a deployment:service:user channel, and a deployment:user channel, like -
class Deployment < ApplicationRecord
broadcasts_to ->(deployment) { [:deployment, deployment.user_id] } # deployment:1
broadcasts_to ->(deployment) { [:deployment, deployment.service_id, deployment.user_id] } # deployment:1:1
end
Why do this?
When one of our users is on their dashboard page, we want them to see a a live feed of all their deployments. They can also click on a Service and view just the deployments for that service. In that case, we want to keep showing a live stream of deployments, but only for that specific service.
So, in dashboard/index.html.erb we have this -
<%= turbo_stream_from [:deployment, current_user.id] %>
And in services/show.html.erb we have —
<%= turbo_stream_from [:deployment, deployment.service_id, current_user.id] %>
A bit more on naming
Hotwire does a lot of behind the scenes work to grab the correct view partial, and render it correctly on the frontend. How does it know what to grab?
Let's investigate our Post model — Open the console and run the following —
rails c
Post.model_name
You should see this —
#<ActiveModel::Name:0x0000000107ce5b50
@collection="posts",
@element="post",
@human="Post",
@i18n_key=:post,
@klass=Post(id: integer, title: string, article: string, created_at: datetime, updated_at: datetime),
@name="Post",
@param_key="post",
@plural="posts",
@route_key="posts",
@singular="post",
@singular_route_key="post",
@uncountable=false>
Hotwire uses this information to automatically determine which partial to grab when we call —
class Post < ApplicationRecord
  broadcasts_to -> (post) { :posts }
end
Which is how we end up with :partial=>"posts/post" in the enqueued job —
Performing Turbo::Streams::ActionBroadcastJob (Job ID: cdd1910e-9711-464e-8c83-40afafbf8cf1) from Async(default) enqueued at 2023-05-25T03:00:22Z
with arguments: "posts", {:action=>:append, :target=>"posts", :targets=>nil,
:locals=>{:post=>#<GlobalID:0x0000000109c66f60 @uri=#<URI::GID gid://simple-hotwire/Post/24>>}, :partial=>"posts/post"}
This is also how Rails knows what to do when we render a collection directly in one of our views —
<div id="posts">
  <%= render @posts %>
</div>
Behind the scenes it's using Post.model_name to determine what partial to grab. This is also how it knows to append: to the <div id="posts"> element on our frontend.
Rails let's you specify a different partial or target if it's grabbing the wrong one for you.
You can do things like —
# Both examples ripped from https://github.com/hotwired/turbo-rails/blob/ea00f3732e21af9c2156cf74dabe95524b17c361/app/models/concerns/turbo/broadcastable.rb#LL79C9-L87C12

# broadcast to a specific target
class Message < ApplicationRecord
  belongs_to :board
  broadcasts_to ->(message) { [ message.board, :messages ] }, inserts_by: :prepend, target: "board_messages"
end

# broadcast using a specific partial
class Message < ApplicationRecord
  belongs_to :board
  broadcasts_to ->(message) { [ message.board, :messages ] }, partial: "messages/custom_message"
end
Conclusion
I hope this article helped you to understand a bit more about Hotwire and Turbostreams, and how they work inside Ruby on Rails. It can be confusing! Once you get the hang of it though, I think you'll appreciate the elegance of Hotwire.
It's also really impressive to be able to build a live frontend without having to use a full-fledged frontend framework like React or Vue.
Overall, I think Ruby on Rails and Hotwire is a great pairing!